The Overhaul 2 Design & Build, Part 9: Where We Actually Begin Building, n’Stuff

This is it! Now that my incredible van hangover has cleared, it’s time to get back to build reports. With 2 weeks left to go until the SEASON PREMIER OF BATTLEBOTS ON JUNE 23RD 8/7c ON ABC!!!! my hope is to clear the build itself and discuss the runup to the event as the season starts. As OH2’s matches are aired, I hope to immediately turn around and prepare analyses of them within a day or two. OH2 is not part of the premier itself, but look for it in the next few episodes that cover the preliminary rounds and beyond!

So, after seven episodes of working through the design – eight if you count my love affair with brushless drive – it’s time to start persuading metal into shape. At this point, it was late January, and I’d just gotten a load of RageBridge2 units in, so we were busy in “fulfill the delayed crowdfunding campaign” mode. It was between RageBridge logistics juggling that I was placing the first orders for materials and parts. As I mentioned in the last design post, a majority of the machined parts for this bot were going to get sent out to external shops which I’d done business with before.

I spent a portion of December and January shopping the design out to a few places, both domestic and in China, to gauge interest more than anything. Here I am, showing up with basically two dozen unique parts, for which I need quantity… 2…. or thereabouts. My contacts are largely production-oriented shops, since I needed, say, 250 DeWut casings or 500 RageBridge 2 heat sinks. They have otherwise much larger jobs that occupy machines for a week at a time. So it wasn’t surprising when only a few replied saying they had the capacity for it at all, much less the ability to turn around quickly.

Robot build seasons are always a blur, and a huge and complex robot even more so. In high school doing FIRST Robotics, it was easy to lose track of where on Earth the past 6 weeks went, and I was definitely in a similar situation with this build! I’m basically going off the photographs’ dates now to reconstruct the series of events which led to Overhaul 2. We begin in mid-February into early March as parts began arriving.  Yes, began. Basically everyone was cutting it this close for a variety of reasons, some of which I’ll likely talk about only after the season finishes airing.

So here we go! First, the main cast of characters involved.

  • Me, the principal designer and I suppose electrical system lead, since OH2 has the most hipster snob electrical system imaginable. I also machined stuff occasionally, I guess.
  • Cynthia, who assisted with fabrication and also creating the team aesthetic and presentation, as she is a graphics designer and illustrator.
  • Paige, chief waterjet babysitter and machinist/fabricator.
  • Matt, Paige’s boyfriend and Biology & Premed student, so we trained him on whatever needed doing at the time.

Oh, also, as the build progresses, I’ll be sprinkle CAD shots back in as things need validation or redesigning on-the-fly as disasters occur. I assure you there was a lot of that…

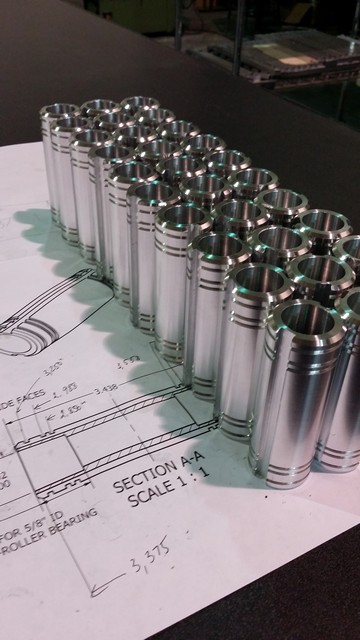
The stinger photo at the end of build report part 7 was of wheel hubs. This was the only “mass produced” part for OH2, since I knew I was going to need spare wheels no matter what. I sent this out to a nearby CNC shop, ARMSET who turned this around in about a week and a half.

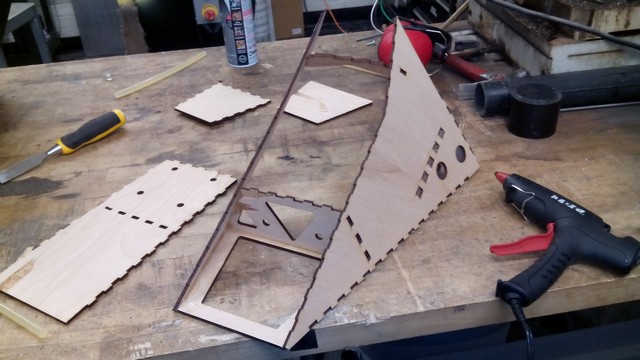
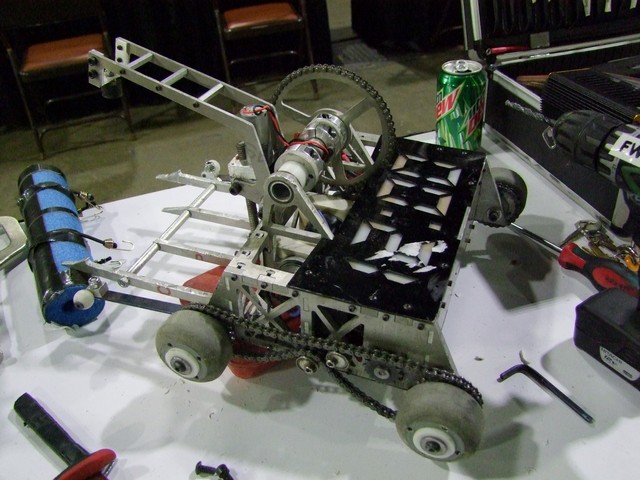
During the intervening time period, I tried to work as ahead as I could on minor fabrication of the associated parts, such as sprockets and wheels. Additionally, I wanted to get a start on one of the weirdest parts of the bot – the welded plate armored pontoons up front.

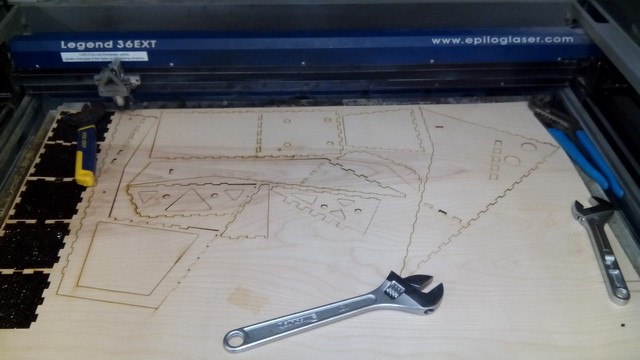
What’s the same thickness as 5mm steel? 5mm plywood, and I think one of these substances is a little easier to put together over and over! I bought some birch model plywood from a local wood distributor, and then proceeded to barge back into my own former shop to use the laser cutter.

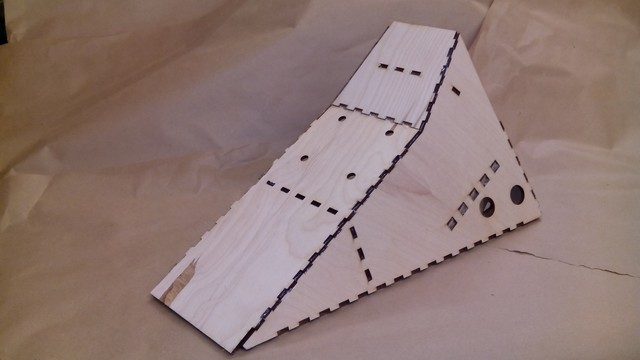
My rationale when putting this thing together: Wherever I can shove the hot glue gun, I can shove the MIG torch. This assembly process went as smoothly as I had hoped, and I ended up building 3 of these to test the assembly order, i.e. “Where do I spray the steel boogers first?”

Here’s a completed armor module in plywood!


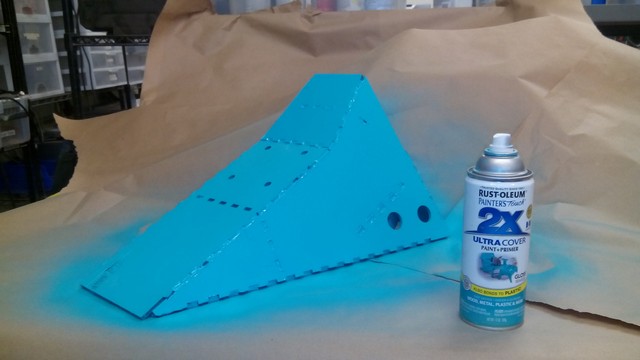
I gave this pontoon a healthy coat of the closest color to Miku Blue I could locate in a Home Depot spraypaint aisle. For the record, this color is Rust-Oleum’s “Gloss Seaside”. The camera white balance isn’t happy here; it’s a lot more aqua in real life.

One of the design choices that we were making early on during the design submission period was the robot and team color palette. Overhaul during Season 1 was naked-ass steel and… red, I guess. There wasn’t much thought put into anything except making it do robot things, so we just went with a red and a gray, similar to MIT’s palette, where gray was just made of #stonecoldsteelaustenite.

This season, I was out to transition the robot to something blue. Specifically, during the early design stages that were detailed in Part 2, when the new application was being prepared, I was all set to make a Miku-themed robot. I shit you not, this is a never before seen concept image which I put together (because of course I did):

Yeah.

Now that I’ve scared everyone away, I can say that this concept was not used because there would have been basically no way to use a copyrighted character as a team mascot or have the character prevalent throughout the robot and team.

So the #mikubot concept was scrapped, but the color lives on.

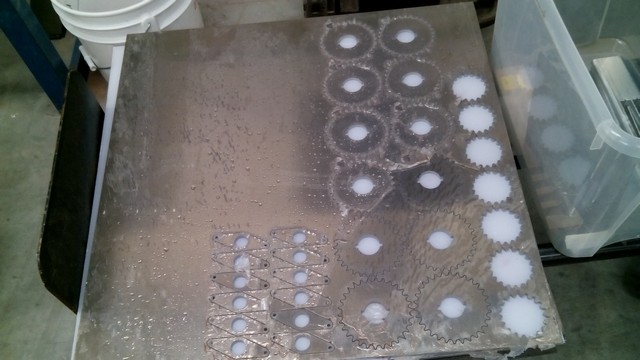
Here is a round of sprockets (that’s a technical term for a group of sprockets!) that fit on the hubs. They’re waterjet-cut from 3/16″ 7075 aluminum plate. Basically, the idea at this point was to assemble wheels as soon as the hubs got in, and then keep assembling drive and lift motors and electronics until the frame got in

The other small parts on the left are retainer brackets for the SK3 motor rear ends.

Other interesting things also began arriving. For instance, these two piece of oil pipeline oil-filled nylon bearing stock. The large rotating arm parts will use machined nylon bushings for radial support. They’re moving at a low speed, so I opted to use plain bearings. Bronze would have been nice, but heavy. I figured at this bulk level of usage, the nylon would do just fine.

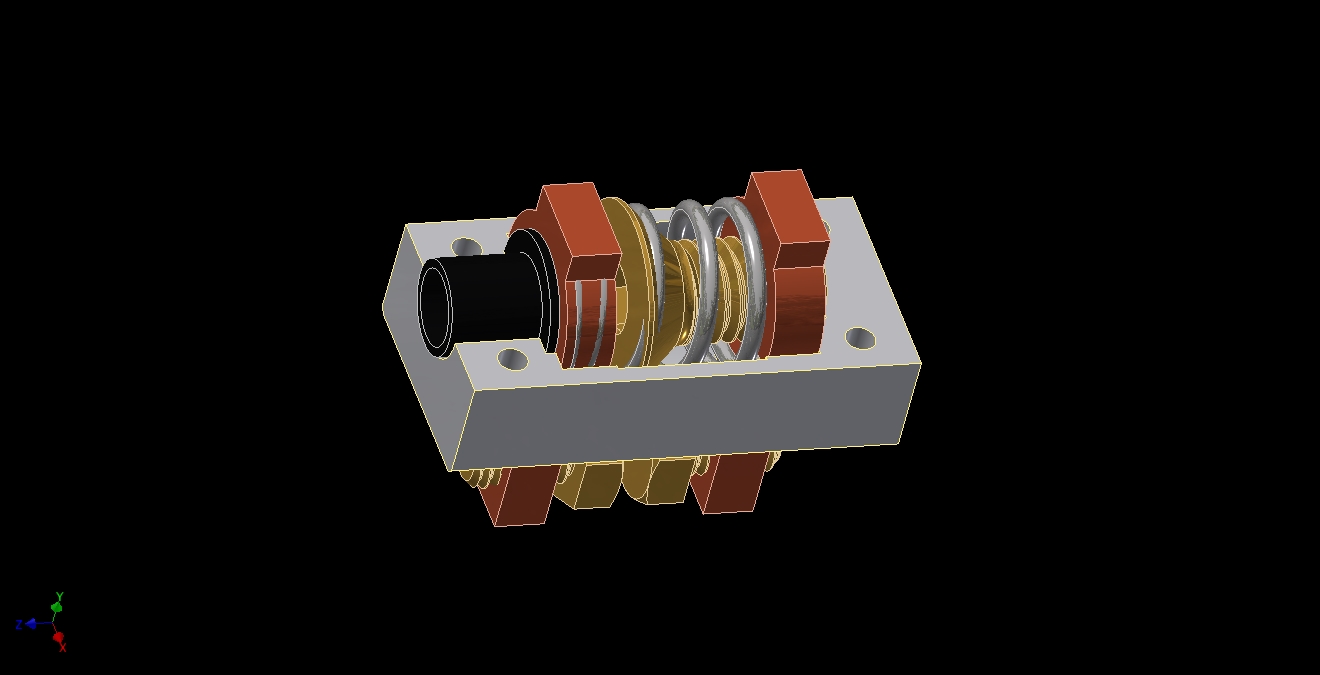
One of the first electrical system experiments I wanted to verify was the custom master power switches (a few pictures down). Recall that I designed these because fitting two Whyachi MS2s in the bot was becoming a daunting prospect when accessibility was factored in i.e I wanted to retain the side approach arming.

Shown above are some copper contacts that were cut from 1/4″ silver-plated copper bar, supplied by McMaster. It seems like this silver plating is largely decorative, because it was coming off if I was rubbing it too hard – probably for anti-corrosion purposes only. Oh well.

The internals of version 1, as simple as you can get. The body is a nylon with fiberglass print, made using a Markforged Mark Two.

I’d like to take this space to welcome Markforged as the first sponsor of the team this year. You’ve seen a lot of action on this website and on Jamison’s site with Markforged parts, and they know there’s no better application to have their parts mercilessly beat on to show the technology! Markforged is providing Mark Two prints and printing services on their print farm.


While this edition seems to work just fine (it conducts! Yay!) I wanted to refine it more and also fix the fact that the hex key could, under some angles of insertion, be the first thing to close the circuit. Obviously you don’t want this to be the case. I also wanted to add a biasing spring to lessen the likelihood that if the closing torque was insufficient, that the screw would just back off and leave everything disconnected (or worse, constantly arcing). Here is the version 2 updated basically after I finished printing Version 1. The black nylon bushing proides a long entrance guide for the hex key so it can’t touch the switched contact under normal use.

After a McMaster order, the version 2 is completed. With a dab of conductive contact grease on the spring, the action was smooth and repeatable. I was satisfied with the design at this point, so I printed more with very minor dimensional changes for fitup.

Around this time, my order of wheel bearings arrived. They’re 5/8″ bore needle roller bearings that are pressed into the hubs. Shown also is a single 5″ Colson wheel which I test-broached with 1/4″ keyways.

This work was done just in time prior to the arrival of the first big batch of parts that needed significant modification and work, which is the drive and lift gearboxes…

Oh god that’s a lot of Banebots.I ordered 10 4:1 gearboxes and 4 16:1 two-stage gearboxes, plus a basket of spare carriers, shafts, and gears.

My personal guess was that if the gearboxes were going to fail, the 4:1 drives would fail first due to rapid reversing and direct shock from the drivetrain, like running into things. The lift gearboxes would be reasonably isolated from torque impulses by the 12:1 external gearing and the clutch. I ordered enough gearboxes for drive such that I could build 10 drive motors and, in accordance to the serviceability inherent in the drivetrain design, just swap out motors and deal with piecemeal repair later.

That’s one of the things which trips up newbies some times is how expensive everything gets once you factor in the ability to repair rapidly. While the initial cost outlay might be high, what is the cost to you of losing a match when you could have been able to put the machine back together if you had parts?

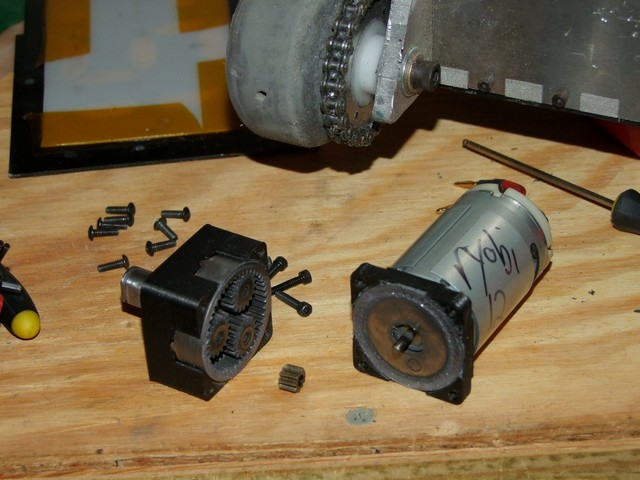
Two things needed to happen to the Banebots gearboxes to turn them into drive and lift motors. The motor mounting blocks had to be machined down to 1/2″ thick, and then the hole patterns drilled. Paige and Cynthia took up this job using some of the equipment in the IDC and CNC mills in the same building.

I continued the “weird science” part of the build by working on the two-speed shiftable “P90X” gearboxes. For this, I waterjet-cut out of O-1 tool steel a replacement planetary carrier:

That’s it on the right. This carrier has (reduced size) teeth and fits perfectly into the ring gear on the left. It has hole patterns for both 4:1 and 3:1 gear stages. The idea is that the sliding ring gear either is anchored to the gearbox housing, or is meshed with this carrier and spinning with it, bypassing one stage.

Here’s a comparison of the carrier plates after I transferred the pins over. The next operation for this setup is to chamfer the edges of the carrier teeth and create a mating chamfer to the ring gear, such that they can collide and mate smoothly.

The other side of the ring gear needs to be firmly affixed to the front output block of the P80, since the ring gear is no longer held in compression between the two blocks. To do this, I basically turned the four dowel pin holes on the ring gear into holes for four shoulder screws. Notice that I’ve already cut off the ring gear here, too.

The four pins that were in the output block were removed, then their holes drilled out directly and counterbored on the other side for the shoulder screw heads.

We interrupt this build report for….

EPIC LIFT GEAR! From now on, every time I say EPIC LIFT GEAR! it will be in bolded capital letters with its own exclamation mark. Consider it a single lexeme. Anyways, the EPIC LIFT GEARS! arrived from…. Amazon. These are giant spur gears from Boston Gear, who lists its basic catalog on Amazon Prime. I’m super happy about this and encourage all industrial suppliers to do it.

Part 1 of the EPIC LIFT GEAR! is the 42 tooth, 12 pitch intermediate gear, which will be turned into the lift clutch. The other EPIC LIFT GEAR! above it is the 6 pitch output pinion. It will be face width reduced – I don’t need the ridiculous 2.25″ face width – and then broached.

I used the MITERS Clausing lathe to bore out and dish the interior of the 42 tooth gear, and also cut off its hub. This is it – the intermediate EPIC LIFT GEAR! will just have a bushing in the center such that it can spin on the clutch shaft.

Next up was the clutch shaft itself. In the latest McMaster order, I put in for a length of 1144 steel, commonly used for high-stress round things. This needed to be turned from a 1.5″ round into a 1.25″ shaft with two 0.75″ ends and a 1.25″-12 thread on one end.

I decided to practice threading again on some aluminum first, since it had been a while since I last made giant custom threads, and I was also unfamiliar with the new MITERlathe’s threading controls.

I then mounted the shaft in a mill to do the secondary keying operation. This keyway is for the 6 pitch EPIC LIFT GEAR!, since the 42 tooth intermediate gear will be sandwiched using clutch plates. However, I decided to make the keyway full-length such that I could make the clutch plates themselves keyed, to assist in torque transmission.

A little bit of Scotch-Brite and wire brushing to deburr the threads, and the clutch shaft is completed.

Here’s what the clutching setup looks like for now. I had yet to receive the order with clutch lining material and giant conical washers, and the pressure plates still need to be cut.

While this mechanical work was going on, I was working ahead a little on the electronic side of things. Little I know the build was about to take a tragic turn…

dun Dun DUUUUUUUNNNNNNNNNNNNNNNNNNNNNNNNNNNNNNN


By the way, Overhaul 2 swag is now up on the BattleBots store. Builders get a cut of the sales of all swag, so here is your chance to indirectly sponsor Equals Zero Robotics!
The Unlikely Story of MomoCon; 12 O’Clocker Returns, #weeabot Intensifies, and I Haven’t Broken Down Yet

Momocon is a pretty big anime & gaming convention that’s been running in Atlanta for about a decade now. I’ve somehow never made it to the event – either it was inconveniently timed being the end of the Georgia school year back in high school, or I was, you know, up in Boston getting my degree in Hoodrat Stuff & Bad Things.  So when the organizers of Robot Battles and the Atlanta-area builders, including some members of the Chaos Corps, were hinting that the next event might be held at Momocon, I quietly rejoiced…..and went straight back to work on Overhaul (Which I still owe everyone the next edition of the build report for…)

Whether the original announcment went unnoticed because of the build season, or it wasn’t shouted loudly enough across the community, I actually didn’t remember anything about it until, oh, about 2 weeks ago when I was reminded by some people asking if I was coming.

Ooh…. well crap. That certainly is going to mess with my plans a little. I mean, I guess I could probably go, but it’s kind of a short-notice thing and I dunno if it’s worth flying down for just one weekend and what will definitely be a small event. And I’m not sure if it’s worth the time to drive, even if it means I could bring Overhaul and display it, bec…

hold on a second. didn’t i quit a job or something so i could do stupid robot things whenever i wanted?

Hey, I’ve spent all this time promoting #weeabot, and here is a robot event at an anime con and I’m actually debating whether or not to go? Load up the van!

But before I could do that, I had to make sure of two things. One was that I had a working robot, and the other, a working van. I’m so good at life, guys.

12 O’Clocker

I stood over my pile of small robot wreckage, wondering what exactly I could bring to the competition. I was missing parts that would need to be rush-ordered for almost all of the 1lb and 3lbers, like Colsonbot and Stance Stance Revolution. Überclocker is a wreck throughout, and I also promised that it was done for real after Franklin Institute.

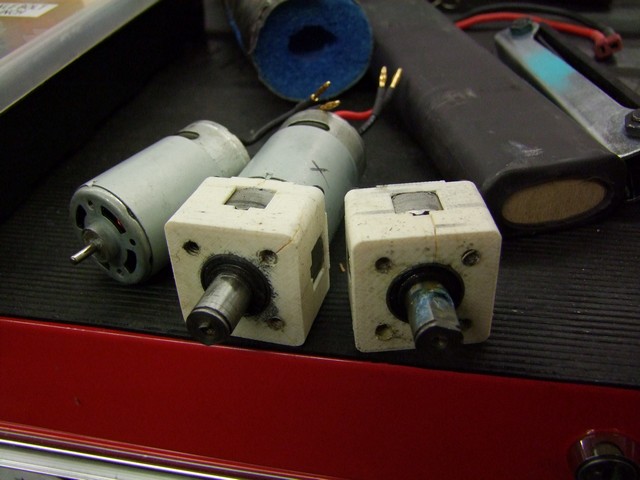
Then there was 12 O’Clocker. Put together for Dragon Con 2013, it didn’t do too well because its drive motors fell off. Beyond that, the bot was undamaged. I figured in the time I had remaining between when I’d need to leave, which was about 4 days spanning a weekend, I could at least remake the drive gearboxes. Those things were originally 3D printed from ABS plastic using the Dimension 1200ES machine. Now that I had access to the MarkForged Mark Twos, I could make them from nylon, which is a much stronger material in the application.

So that was it – I was just going to repair 12 O’Clocker for now. I discovered while trying to put Colsonbot back together that I was short on Vex 29 motor controllers to have it run, so there goes that.

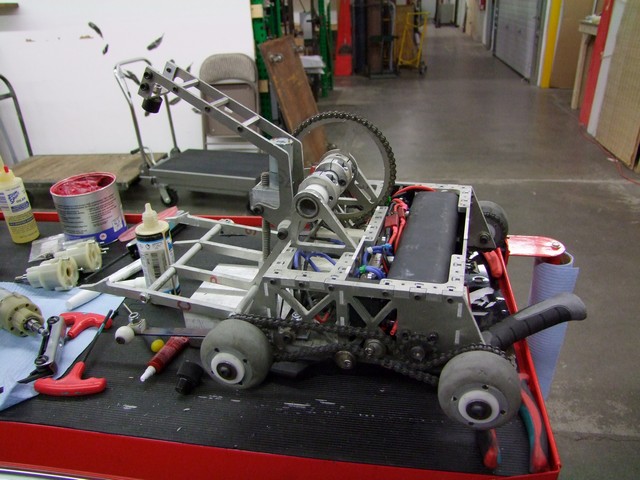
Here it is, dug fresh from my crypt of robots. There’s really nothing wrong with it at all that I could tell, but I’m going to fully deconstruct the drivetrain and liftgear just to be on the short side. As a reminder, the drive motors broke off their mounts at Dragon Con 2014, so the drive will be my focus.

Pulling stuff apart little by little revealed things that I forgot I had Loctited, and other things which weren’t. This was chance to correctly detail the bot. For instance, the inside bolts that hold the axle stubs to the frame SHOULD be very tight and threadlocked to prevent the axle from moving. The external retainment screws should not, in case I had to change wheels. For at least 2 of the wheels, this was backwards for some reason…

Extracting the gearbox housings…. Ouch. Not only were the motors jiggling and detached, the gearcases were cracked clean through in some places. This seemed very strange to me, since I ususally know 3D printed ABS as being quite tough and flexible. Short of the oil-based grease getting into the print and damaging the polymer, I’m not sure why this happened.

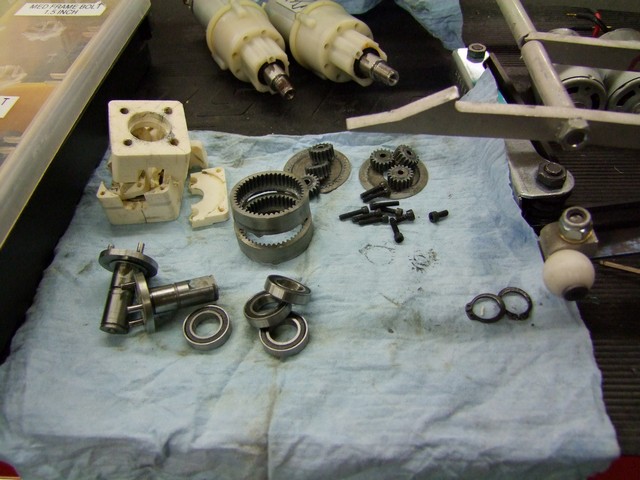
You can see that the cases weren’t just cracked, but broken through in numerous places. Here are the gearboxes entirely taken apart and ready for cleaning.

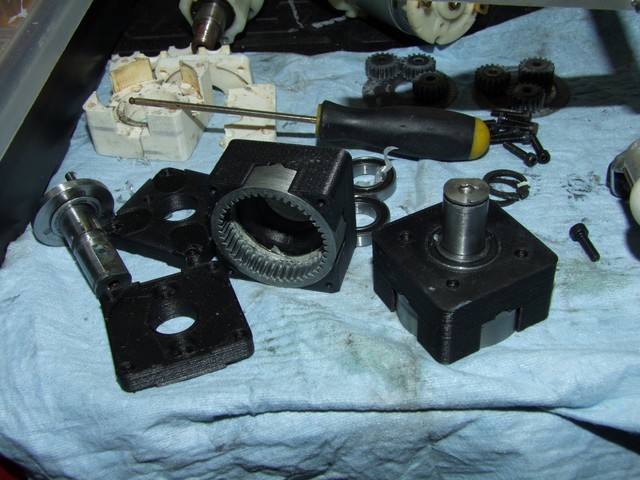
I modified the gearbox part files just a little to address shortcomings in the original design, such as the diameter of the ring gear socket and its length. I do like these things, and post 12 O’Clocker I kind of want to put some more design effort into them. They were then printed using “close to solid” fill – something like 90% density and the plastic fuses together anyway, and if you go more than that it tends to be blobby.

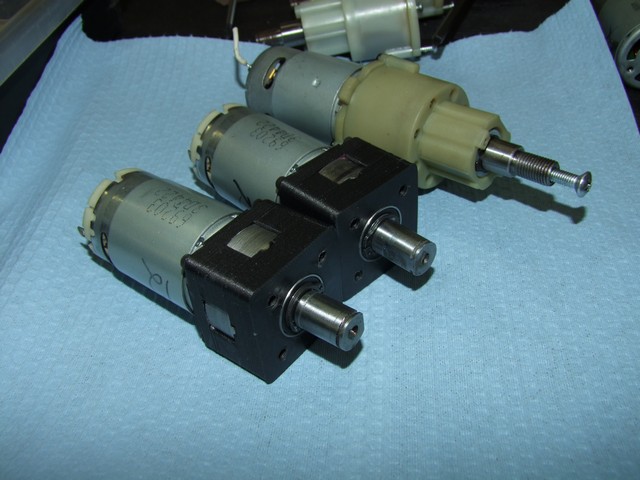
Reassembled and relubed gearboxes using the new housings…

Beyond that, there wasn’t much else that needed work. I went ahead and cleaned and regreased the actuator, since it was very dirty from storage, and adjusted the chain tension of the lift chain also. In all, it was about 1 equivalent afternoon’s work (spread across two, to wait for the 3D print to finish) to get 12 O’clocker back in fighting shape.

cruise control for cool & operation vanfan part II

I next turned my attention to some “deferred maintenance” items on Mikuvan that were acceptable for blasting around town, but not for any type of long haul operation. After the Great Accidental Engine Rebuild Debacle of 2015, there’s been no mechanical and driveline problems at all, but some small irritating things were left over or perhaps caused indirectly by tearing everything apart.

One of these was a consistently leaking upper radiator hose which developed during last fall & wnter. It was just inconvenient enough to get to that I just accepted putting in some more coolant every few weeks. I decided to just get rid of it for the trip, since I did not want to risk losing coolant when driving in the much warmer South. Fortunately, it turned out that the hose was just seemingly improperly seated, and the cold rubber parts did not seal as well during winter.

Next, some time in February, the front heater/air conditioning blower died again. What an inconvenient time…

Now, this thing was rebuilt in the parking lot of Georgia Tech all the way back in 2013. And I quote:

Well, okay, I did have to rebuild my A/C blower motor again, in the Georgia Tech parking lot. Remember those brushes I installed? They were backwards, and they ate through the copper bus wire after a few thousand miles. A random 200W scooter motor turned out to have the exact same size brushes, and saved the day.

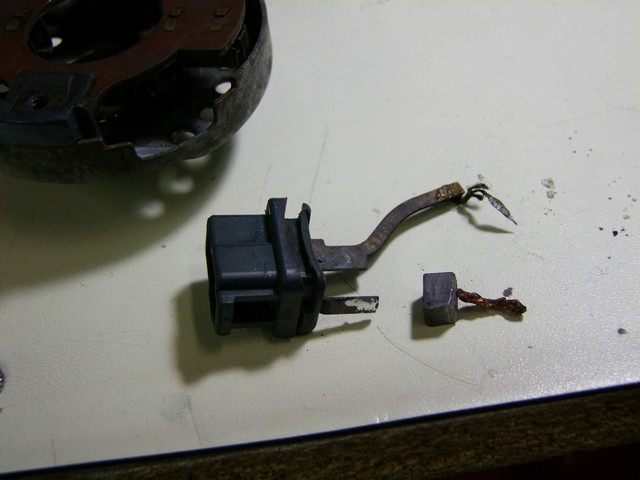
35,000 miles later, those little piddly scooter brushes finally bit the graphite dust themselves…

In this photo I’ve already desoldered one, but the other definitely wore all the way through and fell off. Sadness.

I actually did not have another similar scooter motor to pull brushes from, so I sacrificed a similarly sized motor with larger 6x8mm brushes…. and manually filed them down to 6×6. These brushes were much longer, but they still fit in the same holders. Hopefully, this will last more than 35,000 miles now! If the damn thing didn’t require a dashboard pull to remove, I’d have long ago replaced it with something modern and brushless…

Beyond these two items of inconvenience, there was really nothing I could work on. I know, right?! Time to make a problem for myself.

Little known trivia: Mikuvan has a cruise control system. It’s made of vacuum tubing and actuators, and has never worked. All of the vacuum lines are cracked or broken, and some just lead nowhere or are hanging around.

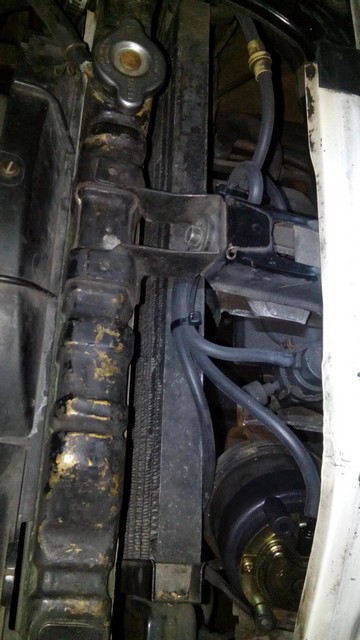
I wondered again how bad things could be, so I bought a spool of vacuum line and hooked everything up the way it was supposed to go. I cleaned the chevk valve and manifolds, and also took apart and relubed (to the degree I could) the throttle cable coming from the vacuum piston. I didn’t even verify if the system was holding vacuum – just shoved everything back in.

Hey, not manufacturer-approved routing, but whatever. The servo piston is seen at the bottom right – this tugs on the physical throttle pedal based on ECU commands. In new cars, everything is by electronic signalling now, so this system is absent.

During this process, I FINALLY figured out where the last missing vacuum nipple on the intake manifold was supposed to go. It was a random vacuum line connection that did not seem to go to anything, and which caused idling problems before I found it, since it was just a big air leak. In the end, this line was connected to the cruise control system. I’m guessing it uses engine manifold vacuum to purge the system. There is a small vacuum pump (which does still work) towards the top of the photo that keeps the system on the other side of the check valve purged also.

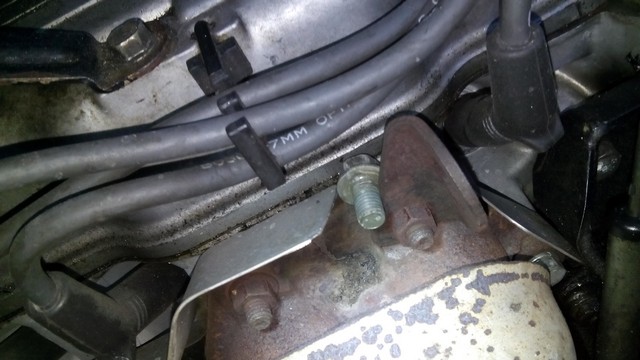
I also found this.

I, umm. Not sure where that came from, nor what it was doing, but it’s a big M10 flange head bolt, so it definitely was doing something important. Well, time to see if anything falls off.

Anyways, the answer was yes, everything still does work. Cruise control!

It is, however, rather boneheaded. I tried testing various potential failure modes, such as setting cruise for 55mph, cancelling, accelerating to 75mph, then hitting resume. Yes, it will attempt to dramatically engine brake from 75 to 55 by just dropping into 3rd gear.

Otherwise, on uphill inclines, it will also fall back to 3rd and make a whole lot of racket and not do much. I’m guessing it’s supposed to go harder in 3rd to bring the speed back up, but it does not seem to pull on the throttle much, and instead I thunder up a hill at 4,000 RPM, and actually also down the other side, because now it wants to go faster than the set speed and is using engine braking to maintain speed.  Definitely less useful than what you would find in a modern car, but whatever, I am told the 1980s were a wonderful time regardless.

On mild hills and flat ground, though, it works great!

The Trip Down & Momocon

There were no shenanigans.

For the first time, I can say that nothing weird happened on the way down. I’m both a little disappointed and now a little fearful of what lies in wait for the return trip.

Out of an abudance of caution, I took the 95 corridor against my own advice. Generally, I try to avoid I-95 below Connecticut and above Baltimore, but it lay closer to possible bailout points (e.g. friends with couches and shops). I tried to set out at a specific time to just barely make it past D.C. before rush hour hit, but goofed up leaving – delayed by about 45 minutes, because I was actually stuck behind a garbage truck in Cambridge slowly doing its thing down a one-way street, among other issues like construction and morning traffic in Boston – such that I managed to instead hit the afternoon commute exactly, upon which I decided to give up and grab dinner, because NO.

I overnighted in Durham, NC, at the best quality sketchy-ass motel I’ve ever seen.


FREE DISASTER INCLUDED WITH YOUR STAY!

Unlike most previous conventions and robot events, I hauled the 18-20 hour trip alone this time, which means that it sucked ass and also I decided to conserve energy by breaking the trip into two days. In 2011, I tried hauling the whole trip in one shot (only stopping to rest enough to continue), which meant it sucked additional ass. So really it took me over 1 day – 14 hours on Wednesday and around 5 on Thursday – but I wasn’t sad and tired when I landed in Atlanta shortly after lunchtime.

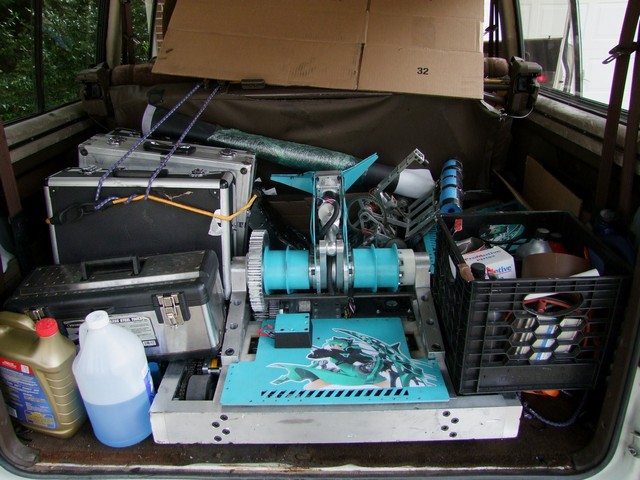
Well here I am!

I have yet to figure out how to wrestle Overhaul in and out myself. I might make some kind of sliding rail system for the cargo area here…

Anyways, let’s go check out the convention!

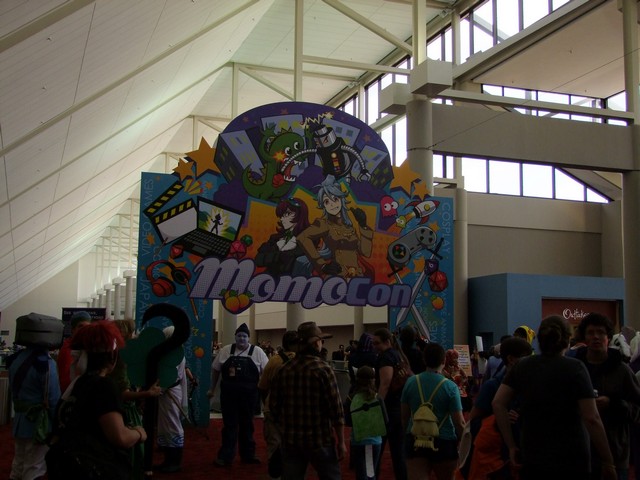
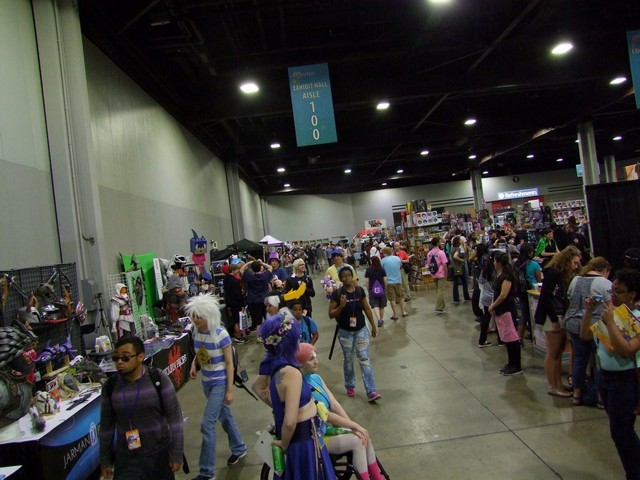
As I said, I haven’t ever been to Momocon previously, despite it being an Atlanta convention. It started on the campus of Georgia Tech, but recently it has amoeba’d it way into the Georgia World Congress Center, which is a huge place. What I noticed in general was that it definitely had the “big convention” atmosphere of something like Otakon or Anime Expo, but the venue is just so cavernous that the crowd density is much lower. So you’re not jammed next to hundreds of people sporting the Con Funk all the time like the former 2… or Dragon Con, which is a somewhat different beast.

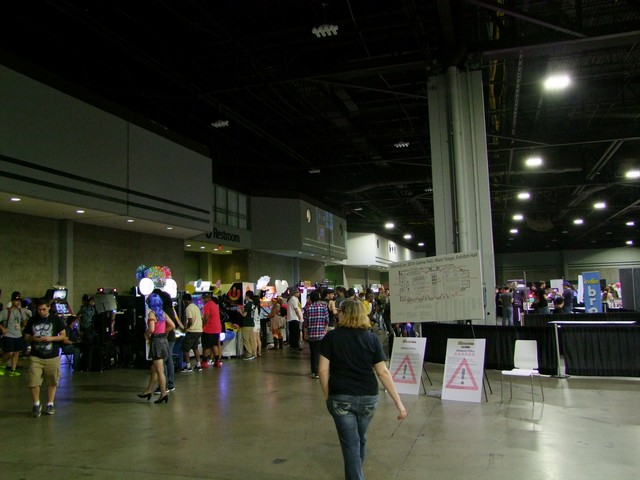
The action was largely on the exhibit floor, which housed all the gaming and sporting activities. The other exhibit halls held dealers and performance stages. It seems to me like the con can easily expand another 50% in attendees without it getting crowded, which is perhaps their idea.

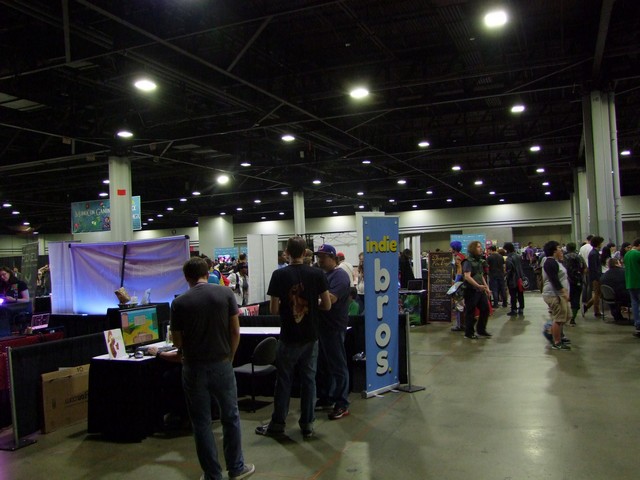
Besides the animus and mangoes, there is an extensive gaming section – indie games, board and card games, on-site LAN party, you name it.

i n d i e b r o s.

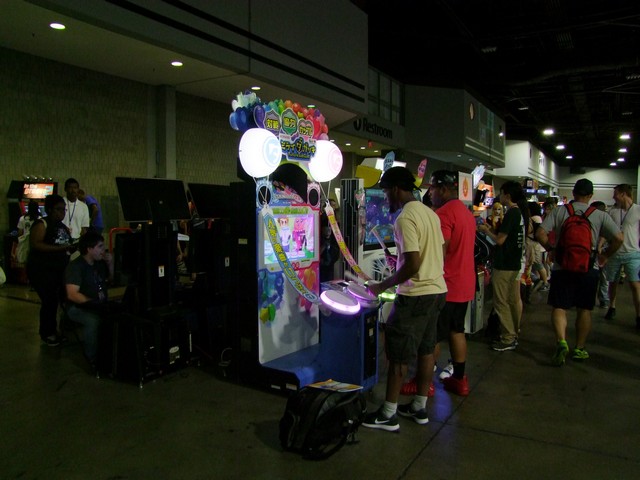
A few dozen arcade marchines – mostly rhythm and music games, were set up here too. Right next to where the robots were gonna go!

Dealer and artists’ hall. Nothing extraordinary to me at this point, and sadly I did not find any Miku gear sufficiently compelling ):

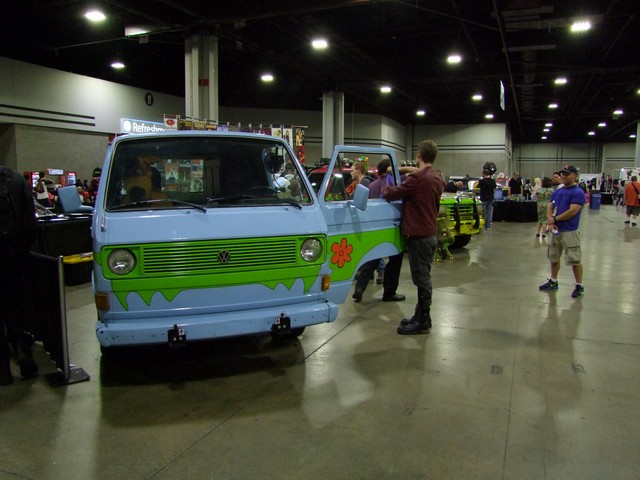
What was awesome, and made me seriously regret not bringing Chibi-Mikuvan… was the “Fandom Replica Vehicle” section. Wow, such a prosaic name for Jurassic Park jeeps. This wasn’t nearly on the scale of an itasha show, which made me sad – actually, there weren’t any of what would be called “itasha” at all.

Next time…

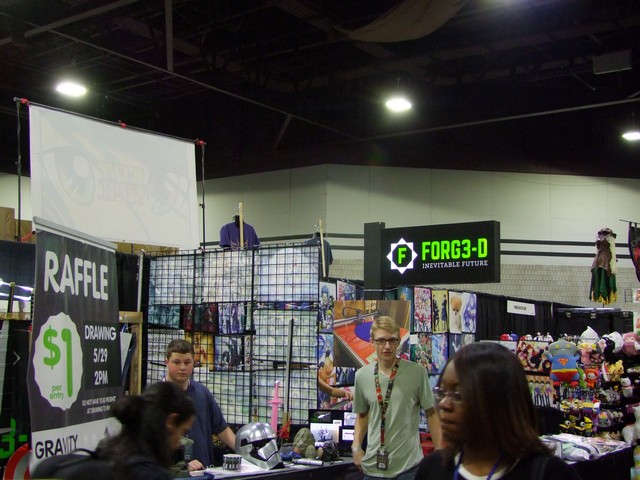
These days I’m usually out to stalk the maker-y parts of conventions, so I was excited to see this group. They make all-3d-printed props, and have the same visual and phonetic branding challenges as MarkForged.

Just kidding, guys. Also, MarkForged, please don’t drop my sponsorship over that. I love you, promise.

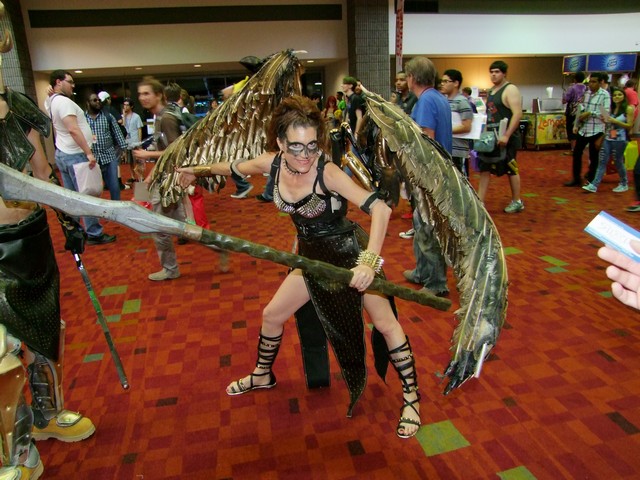
I’m also interested whenever someone has a mechanical prop or costume, such as these actuated wings, which were linkage driven such that when she stood upright, they were folded down, but in this attack stance they were fully out. Constructed entire using garage tools, too!

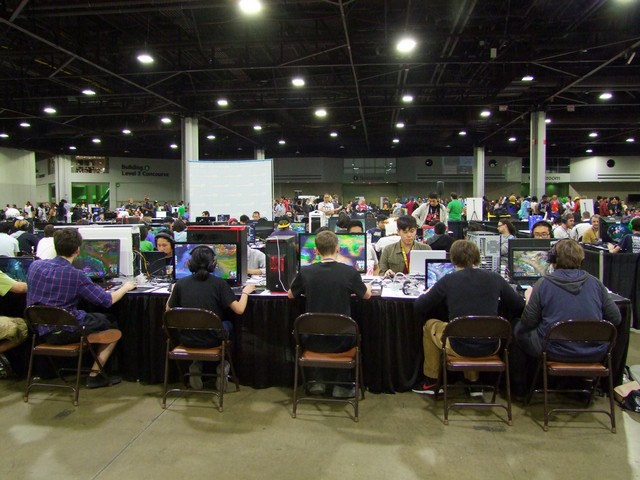
Hay guise, why drag your gaming rigs all the way out here when you can play at home?

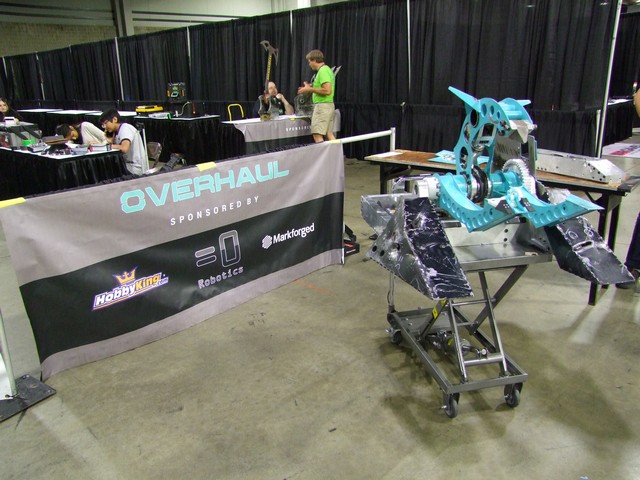
Alright, enough con-gazing. On Saturday morning, I went in early to set up Overhaul for display!

It was set by the entrance to the pit area, and I set up a table to display all the battle damaged parts. How were they damaged?

Well you’ll just have to watch the Season Premier of BattleBots, Thursday June 23rd 8/7 Central on ABC to find out!

-me, about 1000 times during the weekend. Hey ABC, pay me to be a spokesperson already.

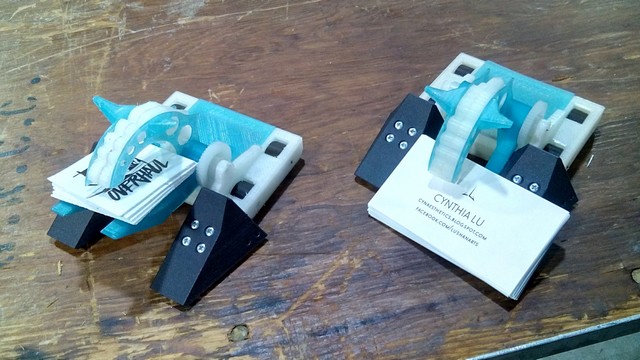
You know what makes the best business card and sticker holders in the world? Tiny Overhaul action figures! Print your own today!
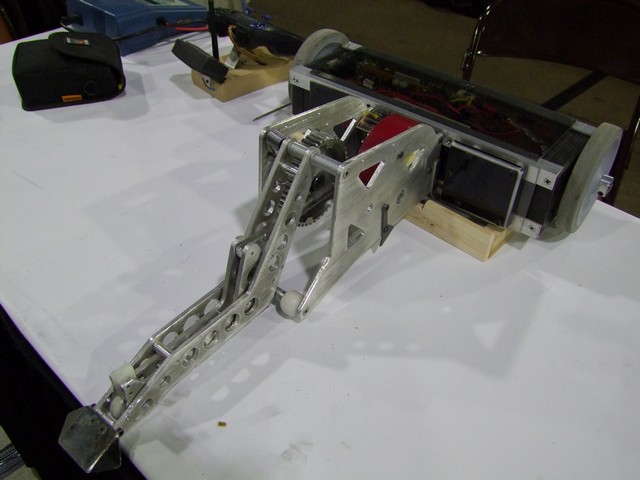
I was actually designing these slowly before MomoCon, and sped up the effort to finish them in time. In fact, one of the last things I did before leaving was dropping by the Artisans’ Asylum to pick up 3D prints for the 2nd and 3rd one.

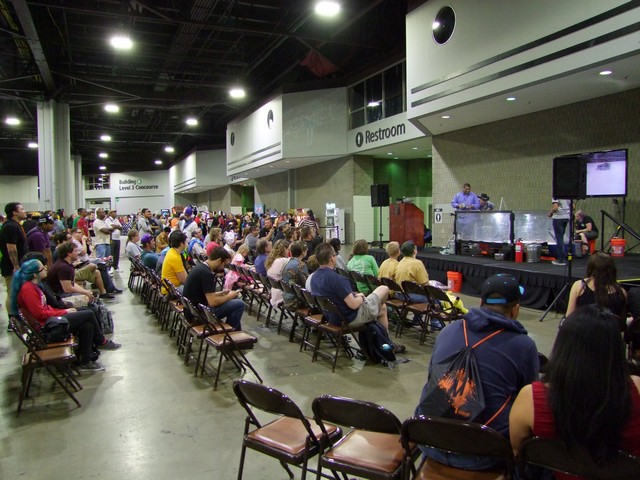
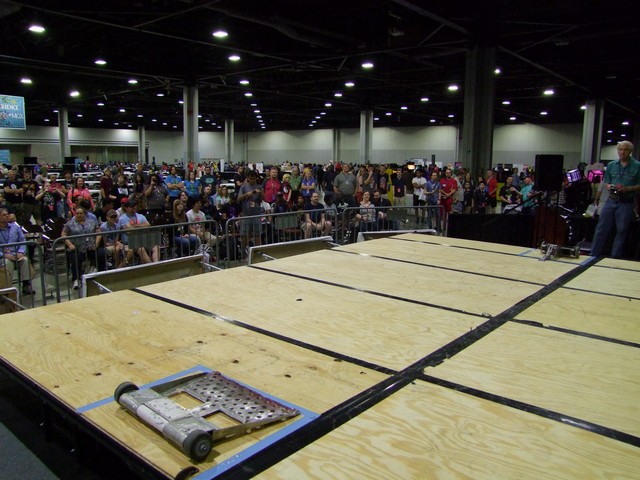
Saturday was the “Microbattles” ants and beetles tournament, where we had 6 in each weight class. I didn’t have an entry, so I just hung around the pit area as pit boss and general event help. The audience was quite steady throughout the event. As usual, the little bots are a bit hard to see up on the stage, so I think a lot of folks didn’t quite “get it”. I did talk to many people about BattleBots, Overhaul in particular, and some other bot talk.

I’d say about 6 in 10 people did not know BattleBots was back on air (WELL I CAN FIX THAT PROBLEM), 3 in 10 have seen parts of Season 1 but were not devout fans, and 1 in 10 knew enough about the show and the robots to ask me a lot of detail questions. I made them promise to build something for Dragon Con.

Sunday, SUNDAY, SUNDAY! It’s “relatively large” bot time! I left Overhaul & displays behind the pit banner, figuring nobody would just bail with it, so it was quick to set back up.

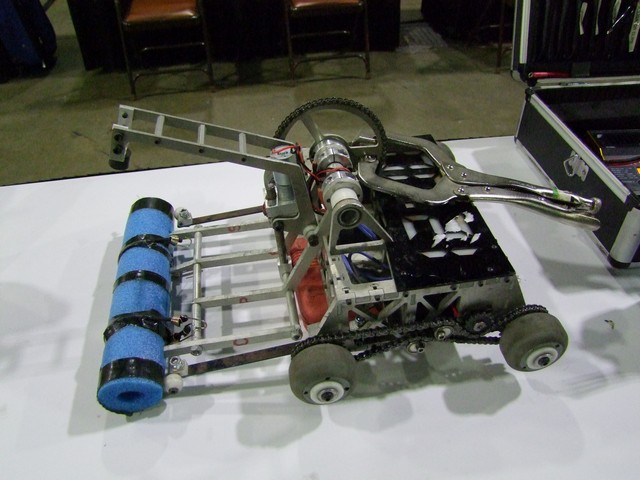
Here’s 12 O’Clocker before matches started. In addition to it, I was appointed to pilot Morrigan. Mike basically brought the entire tournament this time, with 4 30lbers and 2 12lbers.

A view from my corner, which I was manning when 12 O’Clocker didn’t need something tightened or recharged.

Now this audience was much livelier. I guess the bots are bigger and you can generally ‘feel’ the impacts more but we maintained this kind of crowd basically the whole day.  At one point, Morrigan was making so much noise that we were overriding the rhythm games and the whole arcade crowd wandered over to see what was happening, or if they would die shortly.

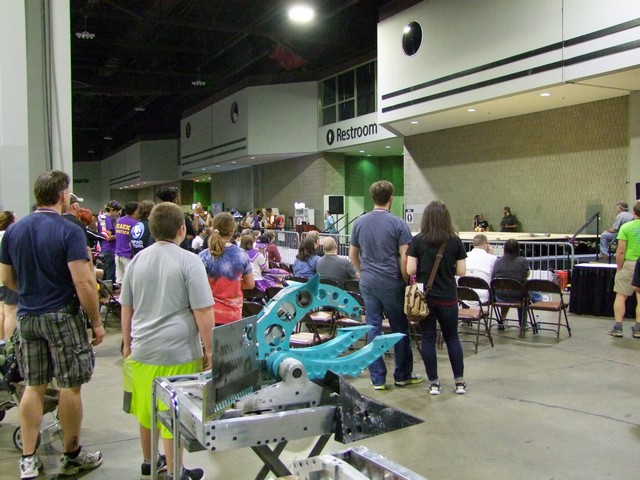
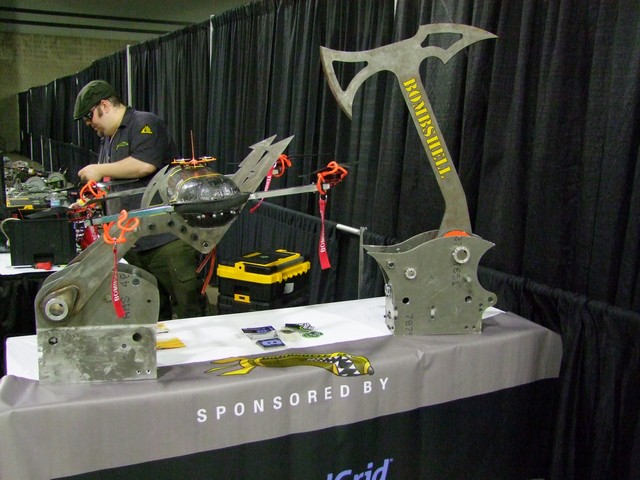
Additionally on display: Giga-Nyx…. err, Bombshell, from Chaos Corps. They only brought some weapon modules. Why?!

Well, you’ll just have to watch the Season Premier of Bat….

Oh, fuck it…

This thing I had been looking forward to. The newest kinetic bedlam from Dale, T-Boner (hhhehehehhehehe) has a scissor-action flipper driven by roughly the same mechanism  as the larger Overthruster. I have an eternal robot crush on KE-powered (flywheel) flippers, but have yet to produce a design. Better yet, it’s also all-brushless, using the same SimonK-enabled ESCs that I run on Stance Stance Revolution and a couple of other people use on other small bots.

So how did 12 O’Clocker do? Actually quite great. I went 2/2, winning against Dingleframus and Hypnus, and losing to Tetanus Shot aaaaaaaaand…. T-Boner. Of course I did. There was a lot of dancing involved, and 12 O’Clocker was a big crowd favorite. 12 O’Clocker can’t excute the “spin to win” grab-and-spin that Überclocker can, but I could relentlessly beat people on the stage over and over.

As per usual, the matches were recorded by Near Chaos, and the playlist for 12lbers is here


12 O’Clocker post-event. Someone in the 12lb rumble snagged on the left side chain and pulled it off, and shortly thereafter I actually lost the right side too. A little post-mortem showed that the drive motor on the right side destroyed its pinion press-fit. It’s a brass pinion on a steel shaft, so the steel shaft won handily.


Besides that, in one of the T-boner matches, I suddenly lost the lifting fork. Turning the bot over, I saw that the ABS mounts for the drill motor had cracked and the motor actually popped off the gearbox. While that was a quick repair for the motor itself, the ABS mount basically stripped all of its screw holes as soon as I took the screws out. To remedy this, I had to drill it all the way through and use some 2″ long bolts I packed which were part of Overhaul’s hardware package that I brought along. I’m not sure if I’ve just been spoiled completely by Markforged nylon prints, or if ABS was always this bad and I just accepted it, but I am so done with ABS as a material.

With my business at the con complete after another tour of the dealer hall, I packed everything back up. I’m actually taking some downtime to visit some possible housing & shop locations, since I am (slowly) plotting my move out of Boston. That means I’ll head back later in the week. We’ll see what van-related adventures happen this time…

Meanwhile,


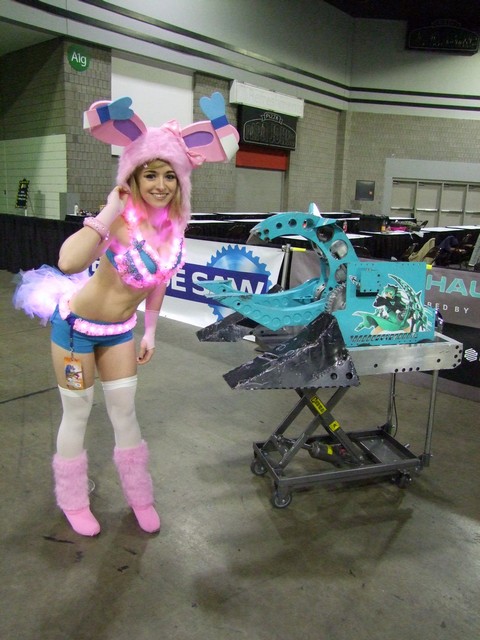
Thanks Cassie Fray Cosplay!