Roll Cake 3: The Build!

It’s time to put a robot together! This post covers the entire fabrication of Roll Cake 3 in the week or so before Dragon Con. The goal of the bot was primarily to try and drive better with an indirect drive brushless setup and also further refine the packaging and action of the flipper linkage. Will it do anything?! Hell if I know, that’s the fun part to discover!

Even as I was finishing up the design the weeks prior, I was pregaming getting parts. Basically as soon as I determined the C2028 motor would fit in the triangle behind the wheels, I went ahead and ordered 3 more since I only had 1 to start with.

I also ordered these OMG THE MOST ADORABLE LITTLE 0.8 MODULE PINIONS EVER THAT COST WAY TOO MUCH MONEY from SDP-SI. I had to go solely by what they sold for 2mm bores in these gears. I wanted an 8-tooth gear to achieve the 8:1 reduction I wanted to get with the wheel gears, but they only sold the 8-tooth with a 3mm bore. So my drivetrain reduction is going to end up more like 10.6:1, which is fine by me – the bot will be too fast no matter what.

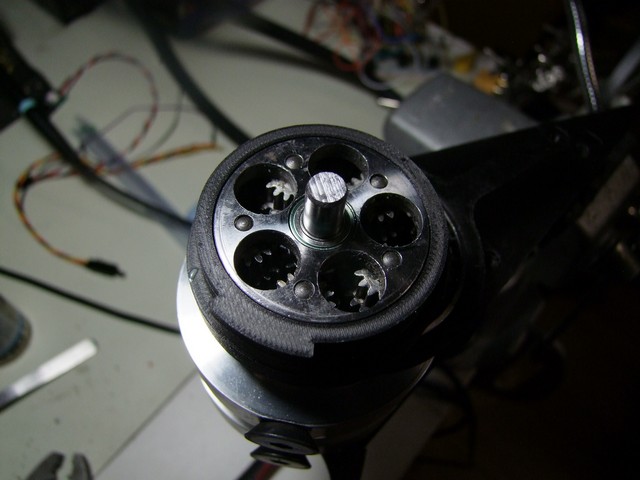
The problem with these tiny gears? The 2mm bores were slip-fit, not press-fit! Certainly irritating, but not the end of the world. Already noted for a revision in the future is maybe transitioning to R/C model pinions, such as R/C car transmissions. Those typically come in 3mm or 1/8″ bores.

I used Loctite 609 to stuff the pinions onto the motors in the end – I tried to silver solder one of them to little success – while I’ve managed to solder or braze pinions before, it seems that the steel they used in this motor shaft is an unusually high chromium grade which didn’t want to take with any flux I had on hand.

That was before I melted the pinion completely. Ah well.

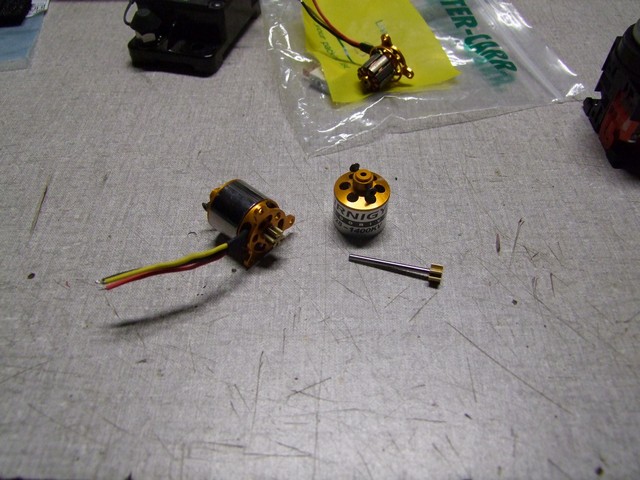
Completed drive motors refitted with their shafts, which was a minor press fit job. I also replaced the stock stainless steel prop-saver screws with drilled-out and re-tapped #4-40 set screws. Another minor point of trouble with these motors is that due to their length and the small shaft diameter, it was hard to get these things to spin entirely true again after resintalling the shaft. A shorter motor (more pancakey) will resolve this.

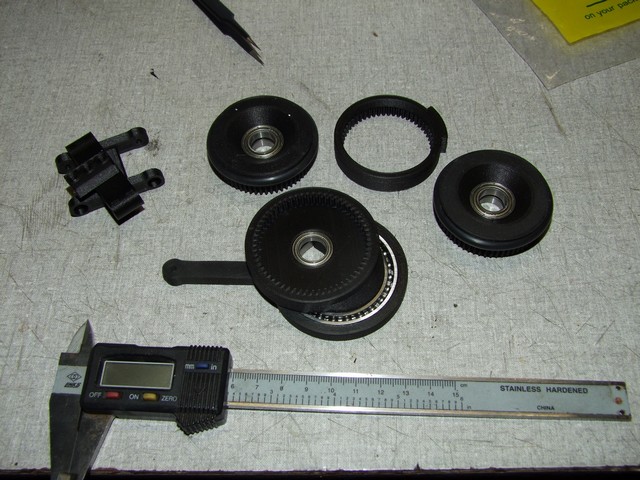
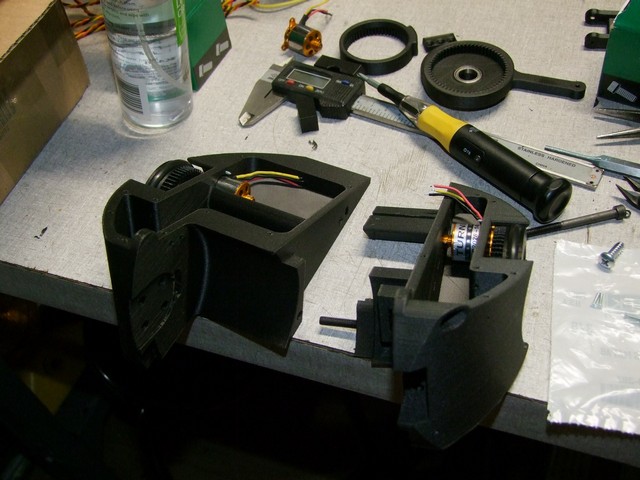
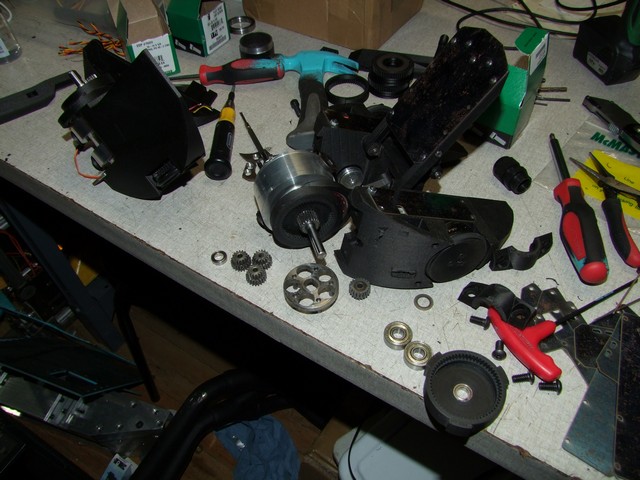
I put the gearbox parts on print in Onyx as soon as I finished the bot design. The two ring gears and main cam linkage (sticking off to the left) have hoops of carbon fiber; everything else just derives strength from a bunch of perimeters. On the very left are the two connecting links between the cam link and the arm. I also made two first-pass prints of the drive wheels, seen here with O-rings.

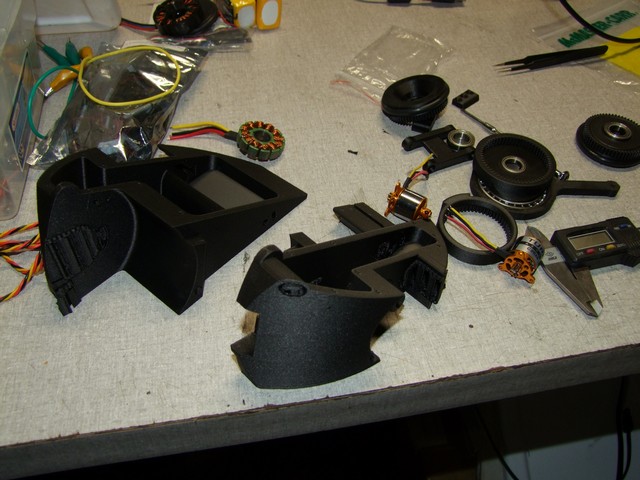
Frame parts freshly done and needing cleaning. I’d say this is the only irritating part of doing unibody bots for me – picking the support out of difficult crevices. There’s certainly orientations that I can print in for minimal support, but they sacrifice immense strength in the part itself.  Both of these frame halves were printed in the orientation shown to give continuous loops in the XY (flat) plane.

In Roll Cakes past, I’ve actually taken to making fiber laps around the frame in this orientation, but with the more recent-ish changes to Eiger, you can change the perimeter and fill with more flexibility such that I just stack on the perimeters.

Otherwise, pull out some injection-molded part design – relatively constant wall thickness and smooth transitions if you can manage it, using ribs and cavities versus just solid massive areas, etc. However, my habit with 3D printed frames is leaving a few bulky areas up front such that they remain somewhat hollow – this acts as a very effective energy absorbing medium. For instance, basically the front inch or so if this bot is solid in the model, which means it’s perimeter plus non-solid infill in real life.


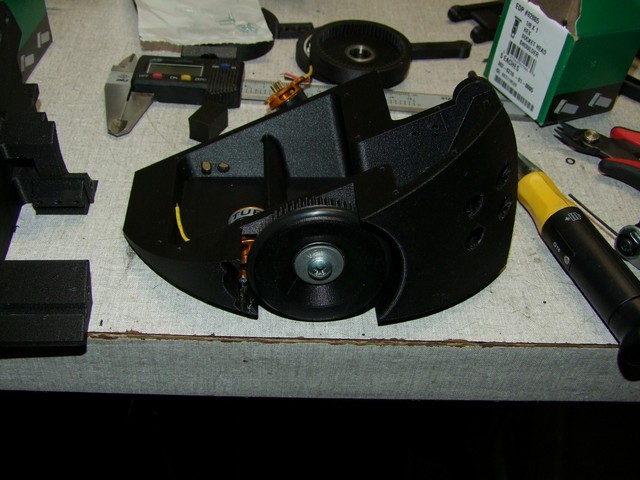
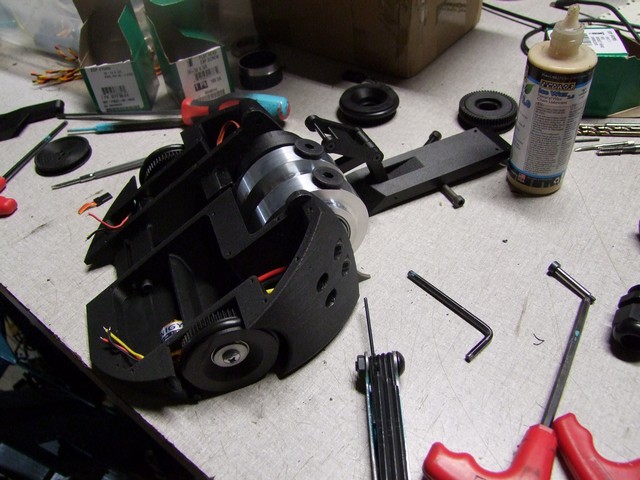
Drive motor installed with some test fitting done on the wheels here. Most of the hardware on Roll Cake 3 is specified as plastic or metal threadforming screws. If you get really fancy, people like using heat-set or tanged flanged inserts in MarkForged prints. However, I like my expediency, so some fat #10 tri-lobe threads will do to hold the wheels on.

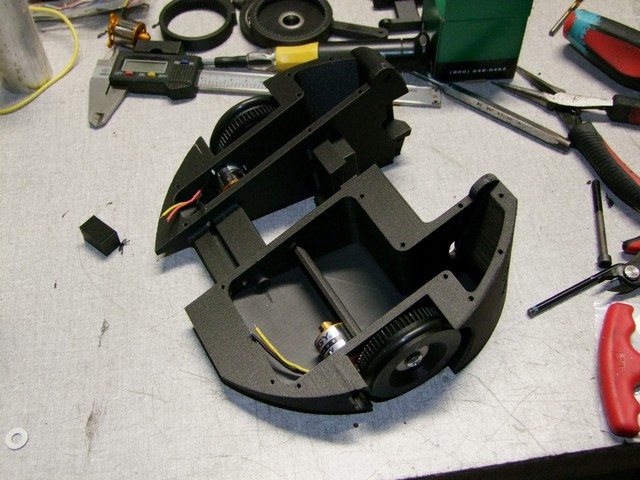
Here’s the final drive fitup. The 0.8 Mod (32-ish DP) gears printed perfectly fine. In my experience, this is about as small as you can print reliably because the nozzle diameter still is small enough to go in and out of tooth tips profiles.


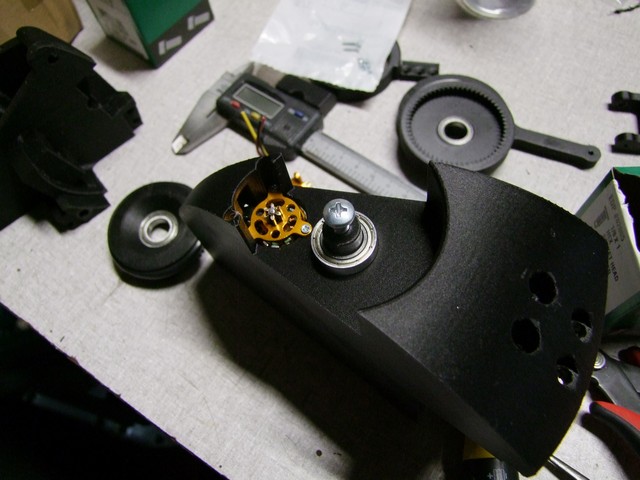
Both sides now fitted with drives. The front binding screw is shown sticking out here.

…and now joined together. Already, this thing is way more rigid than last time side to side. Hell, I might as well just ditch the flipper and make it a pure drum :v

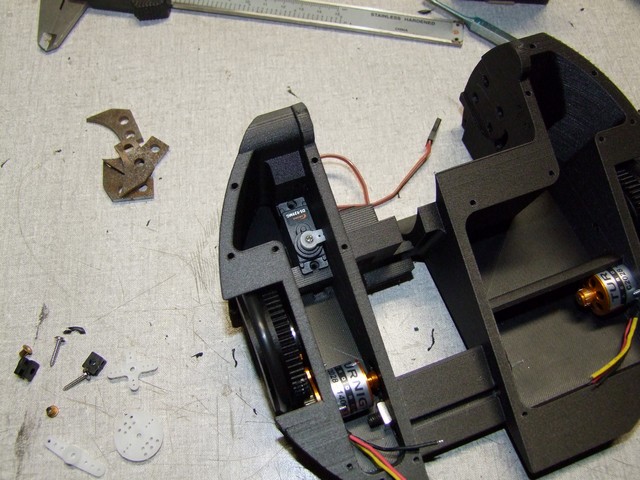
The screw length needed to do this assembly were compromises with what I had on hand, so the bot dimensions shifted a little to accommodate them. Roll Cake is in fact not a perfect circle, but slightly squished inwards to yield the rough double-D-flat shape.

I slid in the trigger piece (which has a cutout for the servo arm) first, then I slid the servo into the DMs.

Alrighty, all the easy 3D printed stuff is assembled now. I still have to make a drum and motor, so off to Taki-chan we go!

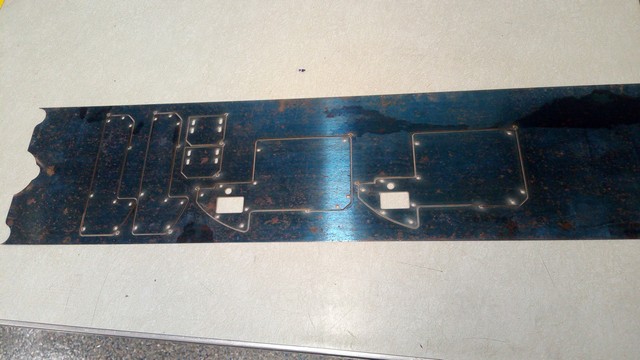
(Also, check out the waterjet-cut feeder wedges made from leftover Hardox 450 from Overhaul!)

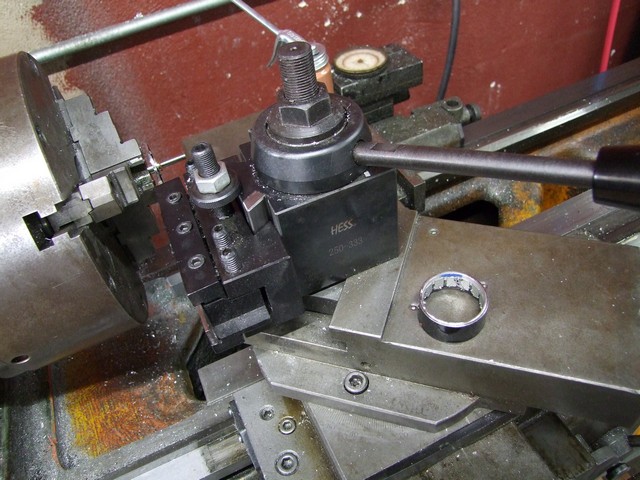
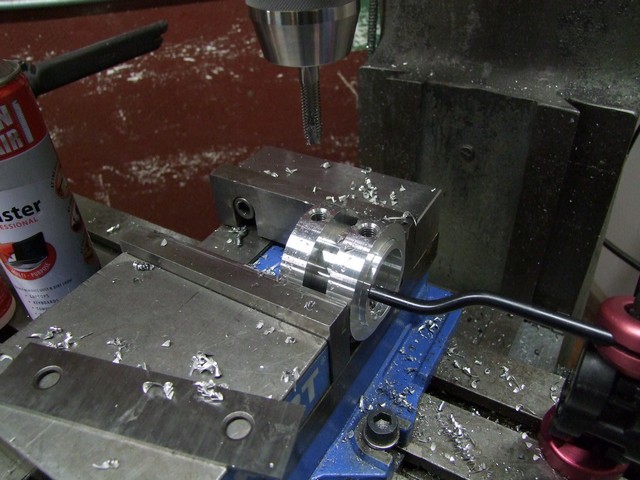
First order of business: separate the motor magnet ring so I can stuff it inside the drum. This can’t always happen cleanly, depending on the motor’s construction. The Donkeys have a single-piece stamped steel rotor, so I simply chucked the shaft in and very carefully parted at the outside corner where the magnet ring area joins the endcap.

With a motor that has an aluminum endcap, it’s often scarier since the parts can separate and self-destruct.  Luckily, this operation went very smoothly with higher speed and gentler feed to keep the forces on the rotor low.

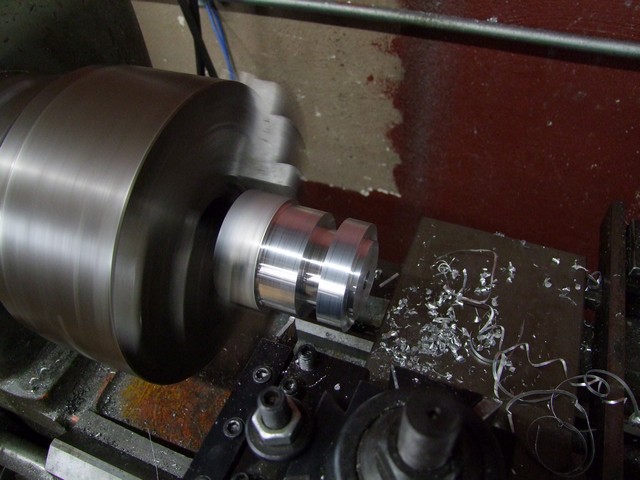
Next up is to rough the drum shape. Most of this was easy, but I had to make the dual-disk shape, so I had to cut a valley in the middle. I just went with multiple staggered parting tool cuts to nearly the right shape, then very very carefully and gently made really shallow passes side to side to clean the profile up. Very gentle. These insert tools really should not be taking any side forces. To do this without wallhacking, I’d have gotten a single wider custom-ground HSS tool or something.


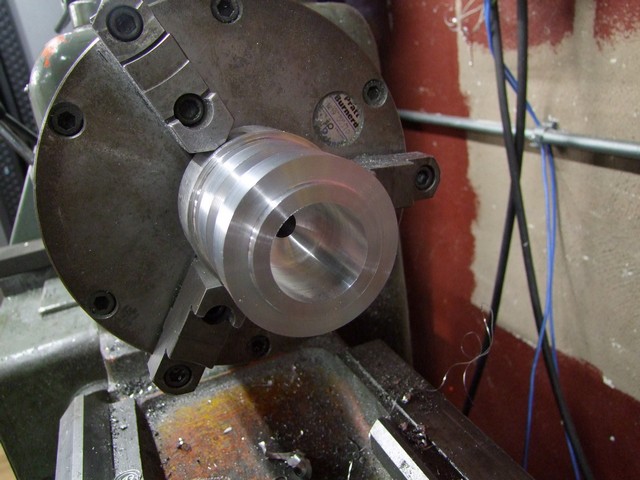
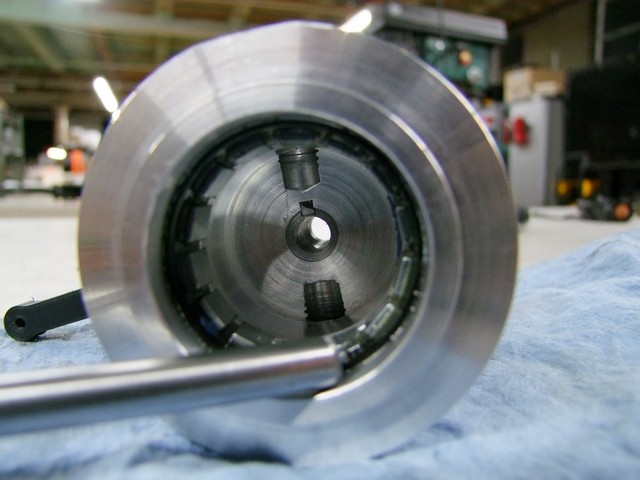
Then I bored the drum interior. There’s three stepped diameters – one for the ring bearing, then the magnet ring of the motor, then the “doesn’t matter” internal diameter. For the output side “bearing-stem-gear” I just did a straight drill to 12.0mm since it did not have to be that precise.

Next up: stator holder.

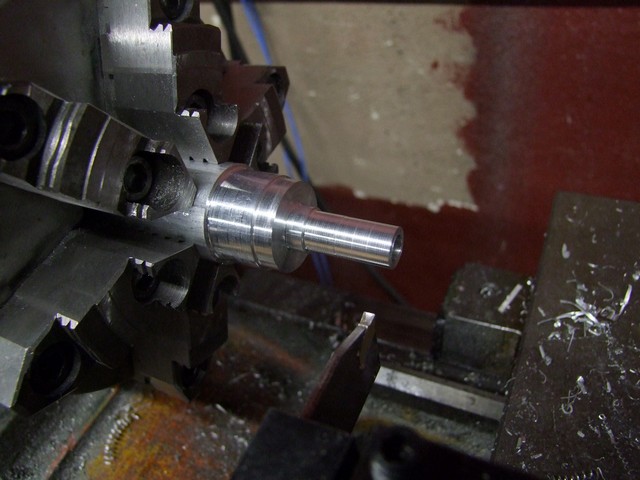
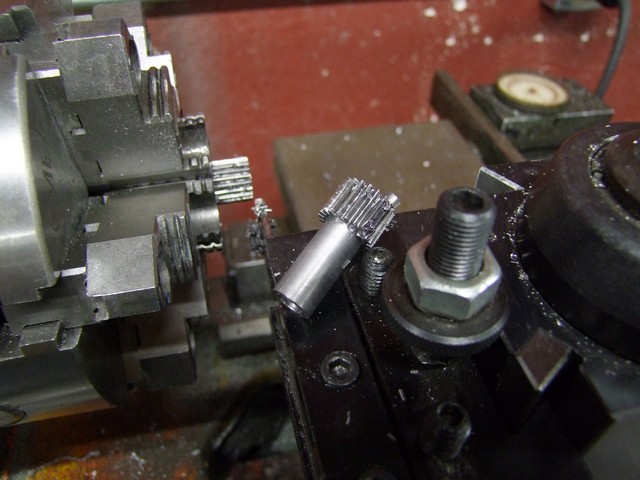
With the aluminum parts roughed out, I decided to make the one odd piece, which is the gear-on-a-stick that will carry the drum energy into the gearbox. This was a pretty easy turning job, but remember, it’s also the other bearing of the whole drum. The center bore, then, had to be 1. a clearance, but not by much, and 2. very clean and precise.

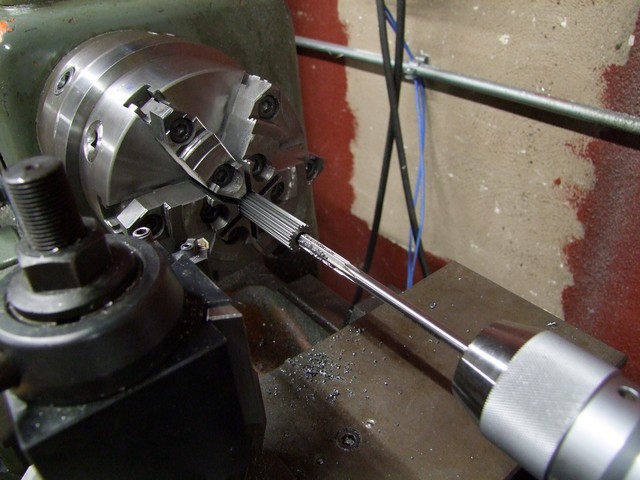
I actually went out and bought a 8mm-plus-0.001″ …. yes, this exists in America…. reamer to make this bore. You read that correctly – it’s a 0.3159″ reamer.

The gear gets a cylindrical boss on both ends eventually. After I finished both sides, I actually had to take a wire brush on an angle grinder to it in order to deburr the gear tooth edges – there were many little burrs and swarf hanging on which would have prevented the gear mate from working.

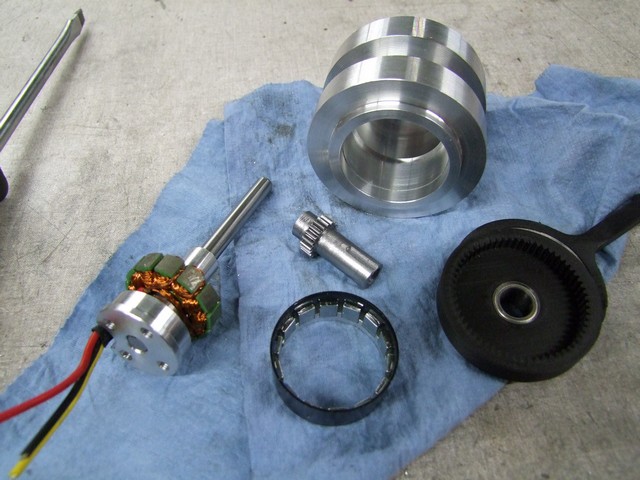
Parts in the midst of preparation! The stator bore has been drilled and the stem gear keyed on the top surface seen.

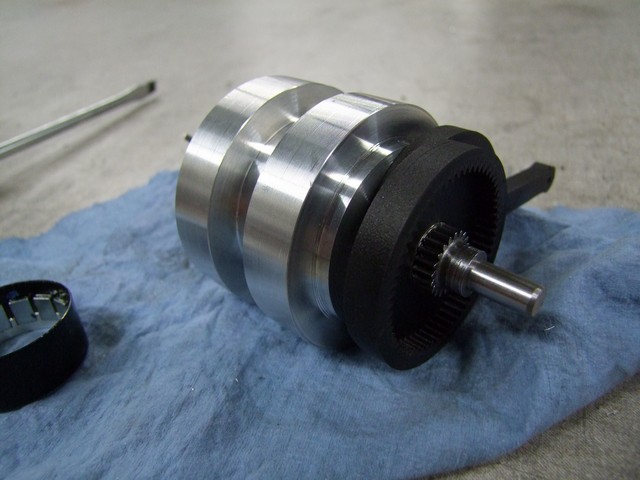
Throwing it together for a quick test fit! Here’s where it’s clearly visible that the stem gear skewers the cam ring gear and the cam linkage.

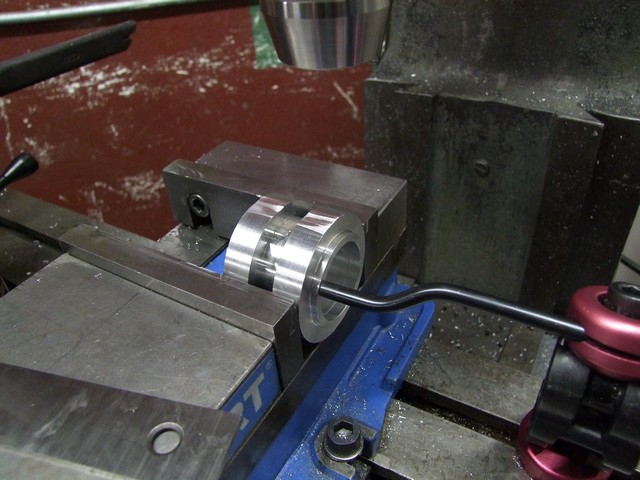
The next task was to drill the tooth holes in the aluminum drum body. I no longer have my old indexing head that made guest appearances in many of my undergrad builds, since I donated it to MITERS years ago. So to make sure I’m able to place the teeth 180 degrees apart, I milled a very shallow flat, then rotated it to sit on that flat, then milled another one.

This ensured I can drill and tap both sides with relatively equal precision. The teeth are just 3/8″-16 alloy cap screws, so they thread right in.

After the drum body was fully fnished, I broached it for a 3mm key – the stem gear is shown here mated to it. The magnet ring pressed into position without much trouble.

Unfortunately, I didn’t have time to make a new set of cluster gears, so I had to take them out of Roll Cake 2. Sad, since I wanted to keep that bot fully operational if I could!

The thought has crossed my mind of hiring out a whole basket of little cluster gears to be made if I’m going to keep evolving this bot.

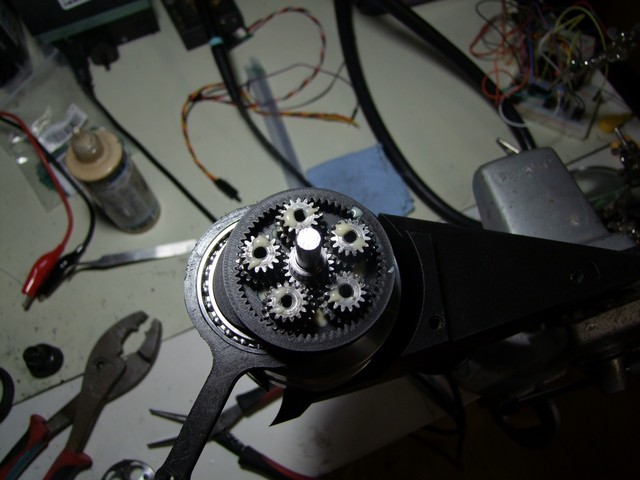
The catch with these compound planetary cluster-fuck gears is that they have to be assembled at specific angle, or phasing, since there’s a hard relationship between the number of gears and the relative tooth counts. I scratched alignment marks into them when I first put them together for Roll Cake 1, and still use them for reference.

The gray goop I have dripped all over the assembly is liquid bike chain wax. I’ve been avoiding using petroleum-based lubricants like common greases because I don’t want to risk damaging the nylon-based Onyx material from the solvent action. Grease would also add immensely to the no-load drag of the gearbox, which is already a lot happening for a weapon drive.

The planet carrier installs easily after the gears are properly phased in place. It looks from here that there’s a ton of stuff going on, but I guarantee you this is not the case :v

As I mentioned in the design post, this carrier now has its own bearing to support itself. This is a pretty odd (but still apparently some kind of standard) 8mm bore, 14mm OD bearing – very low profile.

The drum drops into place from the front. The service order of this thing is a little suboptimal – to service the drum, I have to disconnect it from the folding linkage, but the central pivot bolt doesn’t rise up out of the body’s central cavity…. so really I have to undo the bottom linkage anchor (those three screws in a row from the CAD model) first, then remove the arm hinge. At least I made sure to make it all serviceable with at most 2 tools this time!

After the drum and arm are mounted, it was time for electrical dressup.

Along with the feeder claws, I cut another insectweight top plate set out of this piece of 1/32″ blue spring steel shim. I bought like 10 feet of this shim some time during undergrad, and have slowly been generating robots out of it since. This thing made its first appearance all the way back in 2009 with Pop Quiz’s rebuild! I’m now on the very last 8-10″ of it after Roll Cake’s parts are accounted for!

For better or worse, picking the parts out of the mother material was one of the last things I did before absconding on  3-day long slow meander down to Atlanta for Dragon Con. On the way, I hit up the Blue Ridge Parkway, like I promised myself I’d do. I only brought Roll Cake and its suite of service tools and a box of parts I think I’d need (mostly electronics), and Overhaul for display. This Dragon Con was going to be a pretty clean show instead of scrambling to take care of a few robots – the reason for this is I was pretty much solo this time, as there was a lot of bad timing involved for the various startups and schemes my friends and I are all involved in.

So what’s better than finishing your bot in the airBnB room when you got into town? Not all that much. I pre-gamed some of the electronics wiring (like battery leads and the like) before I left, so installing the two drive ESCs (AfroESC 12A) and weapon ESC (Spider ZTW 40A with SimonK) was a quick affair. I was able to drive Roll Cake around on the floor to get a gauge for its handling – which is much, MUCH improved over the hub motor drive version.

It’s very quick, but much more maneuverably so than Roll Cake 2, which tended to twitch everywhere. I swear the twitching is better than it was! At least now I could predictably send the bot places, which is an improvement over before!

The flipper geartrain was very tight, though, because I hadn’t had the chance to run it fully in up until that point. It would take several minutes of just running the drum at maximum speed and also a while of keeping the linkage engaged to wear everything in.

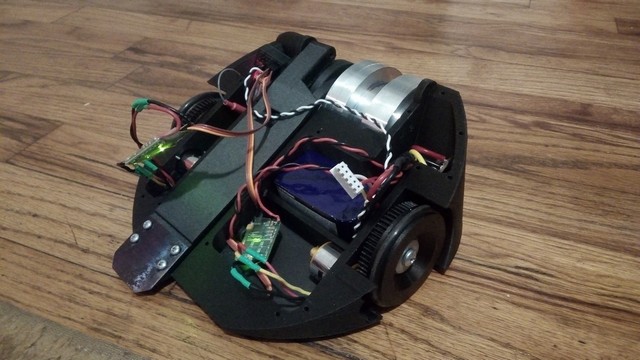
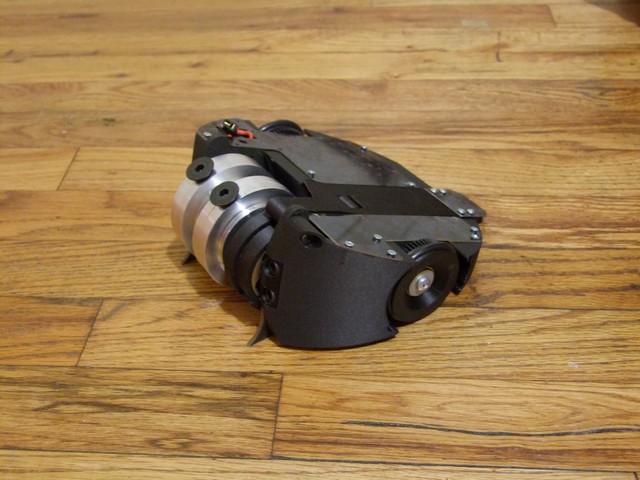
Here’s Roll Cake 3 fully buttoned up!

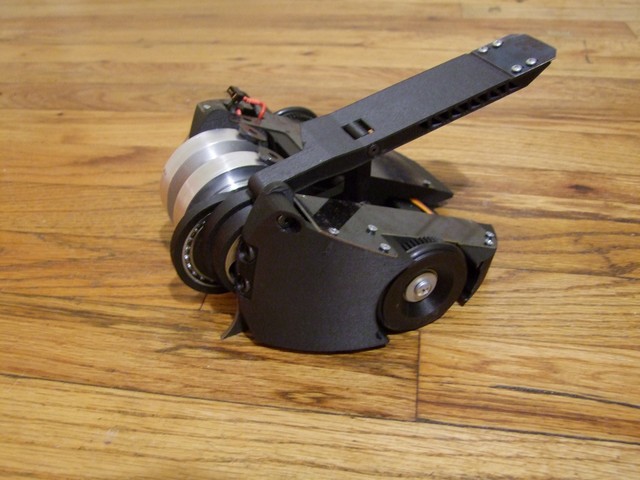
And shown with the flipper linkage at full height. In the next episode, hopefully you’ll get to hear about what it did, if anything!
The Roll Cake that Won’t Die: Roll Cake 3.0

I still like to pretend that I build robots here on this website! So in preparation for the fall round of events I like to go to (Dragon Con, Franklin, and any MassDestructions we try to hold) I decided in August to try and keep making progress on my recent persistent itch – Roll Cake.

Roll Cake had never “done well” – really done much of anything – at a competition since my main focus each and every time is kind of getting the vision of the bot finally in physical form. Remember its origin story and how I’ve been meaning to build a kinetic flipper for years, but never quite gotten around to it. It’s a robot built around a vision of a exterior shape and layout I came up with more than a decade ago, so it’s almost suboptimal on purpose.

Roll Cake 1 was sort of the grand puking of the idea in which nothing really worked. Roll Cake 2 made the mechanism shine, but still had a deficient drive due to sacrificing drivability for space conservation. My goal with Roll Cake 3 was to improve its driveability while making the weapon much more aggressive; Roll Cake 2 had a rather light drum/flywheel being belt-driven by an undersized motor that frequently overheated or shed belts.

The story of Roll Cake 3 actually dates back to not long after the previous Franklin Institute event, to which I brought it in order to talk about Alternative Flippers with a few other builders – it didn’t compete.

After mulling life on the return trip, I began the design by throwing some parts at the version 2 frame CAD and seeing what stuck. The principal design goals for V3 were:

  1. Moving to indirect drive on the wheels – the direct drive, while workable, was obviously still not very controllable. I figured a very small motor could tuck in the wasted volume (there’s a lot of wasted volume on Roll Cake) behind the wheels and could get me a considerable reduction just with open spur gears alone.
  2. Moving, on the contrary, to DIRECT drive on the weapon. The little 22mm outrunner just wasn’t enough to drive the whole geartrain continuously while also spinning a weapon. I could, with the increased drum interior volume, actually have a beetle-class weapon (so, you know, if the flipper plan just falls off a quarry cliff and explodes, it will at least be just a spinner)
  3. And lastly, moving to a dead shaft instead of V2’s live weapon shaft. This was more or less driven by going to a hub motor weapon. I’ll talk more about the Implications of this design change a little further down.

I had a Turnigy  C2028 motor model already, so I used it as a modeling guide for the positioning of the motor. I placed a Stance Stance Revolution motor, a Multistar pancake outrunner, in as a placeholder for the drum motor, though I wasn’t keen on using it. A motor that was a little more primitive seemed a better fit for the weapon.

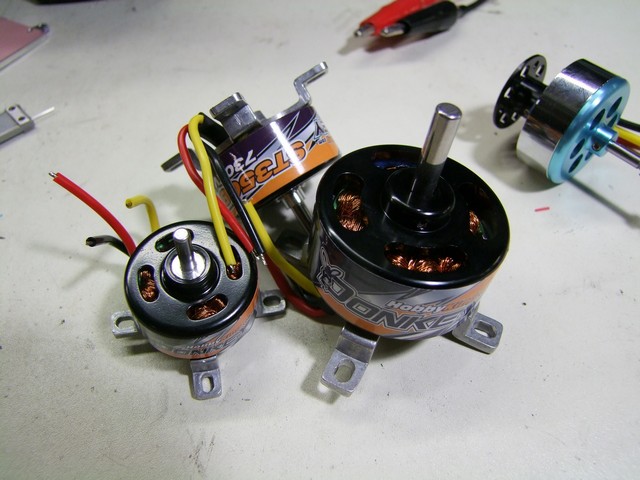
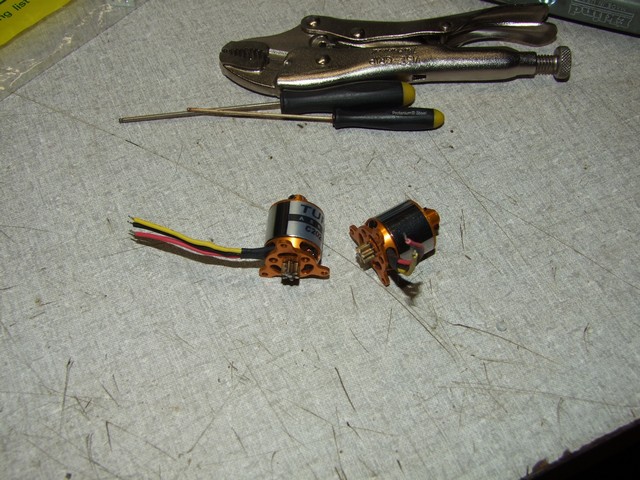
To explore the space, I ordered some of the cheapest, shittiest motors you could buy on Hobbyking in the 35 to 45mm size range:

I love Hobbyking for having the sheer gall to sell you a motor that doesn’t have bearings. The Donkey line has bronze bushings and is seemingly made precisely to be the parts-recycling minimum viable products they are. A lot of builders have used them as foundations for their own weapon drives, and so will I!

I miss making motors, so this will be a fun distraction too.

I ended up selecting the Donkey 3511 motor for its stator size, but more importantly, the 12mm stator bore. The blue and silver “DT700” motor had a thicker stator that I liked, but sadly only had an 8mm bore.

Why the bigger bore? I said earlier I was intending to move to a dead shaft for this iteration. Roll Cake historically has been rather tenuously held together side to side, with relatively small cross sections of material in the center due to the need to fit the flipper linkage. Moving to a dead shaft design allows me to use the shaft as an additional structural member of sorts up front.

The downside is I’d have to make a stator hub that the shaft presses into, and to do that, the stator needs to have a larger hole in the middle. I was intending on keeping the 8mm steel shaft that Roll Cakes have used for time immemorial (as in, literally the same one from v1 and v2), so that meant the stator needed at minimum, say, a 10mm center hole.

I pulled my usual motor designing tricks of making a hub for the stator to mount on, upon which a tpye 68xx ring bearing fits over. I sized this for a 6806 bearing, which has a 30mm bore. It’s a design balance between clearing shaft and wires versus simply being overly large and heavier.

I next generated a rough drum weapon shape that’s hollowed out in the middle. All of the dimensions and spacings were adjustable at this point – the final weapon would be a different width entierly. This just gets me something to start throwing into the CAD model so I can do the fitment of the gearset.

The teeth are, in typical beetle fashion, some big countersunk alloy steel cap screws.

With an eye for weight, I made some parametric adjustable cuts into the drum to turn it into more of a ‘dual disc’ configuration not unlike Witch Doctor and Hypershock. The final drum weight is tuned by just making the cuts smaller or larger.

Next up was the magical Roll Cake gearbox. I made some design changes to make it up to 1/4″ narrower to make the weapon itself occupy more of the front width. The clutch ring now has a single tooth and no longer its own outer support bearing – instead, it simply has a smooth shoulder inside to gently ride on the planet carrier. The carrier itself will have a 8mm thin-section bearing bored into it instead. There will be some extra friction from the technically bearing-less clutch ring, but the much more OP drum should more than make up for it.  I also got rid of an equivalent support bearing on the offset cam ring and it now only has a single bearing also in the center.

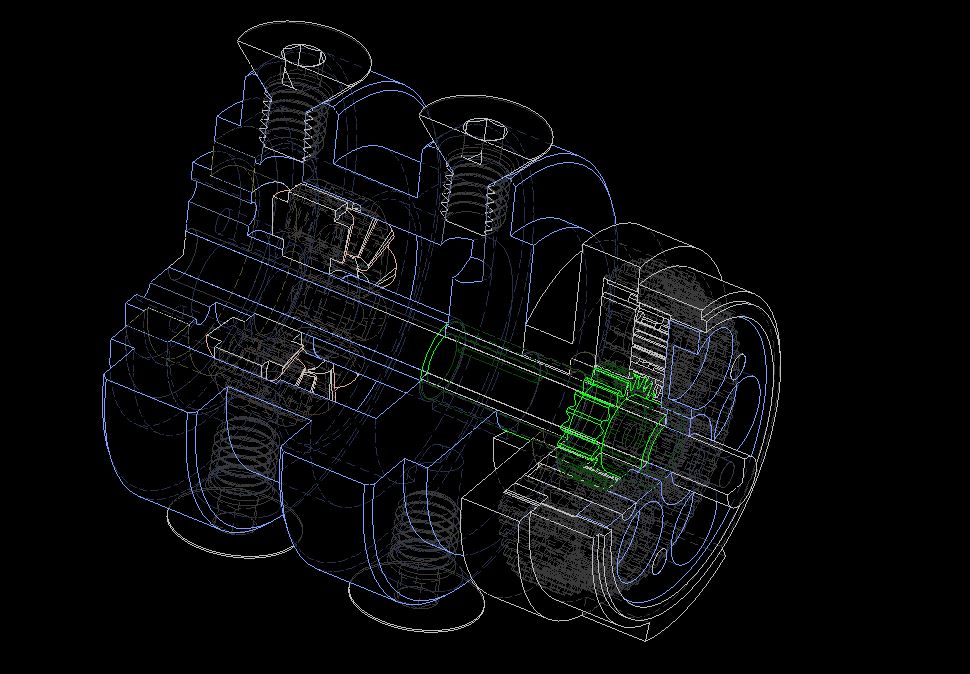
To pass power from the drum into the gearbox via the now dead shaft, I had to do something rather unconventional. There is now a lot of stuff going on here, so bear with me….

The distal endcap of the drum (opposite the motor end) is bored out to 12mm and has a key broached in it. A stem gear with a 8mm clearance bore has a keyway milled in one end and is inserted into the drum endcap with a key. The gear’s stem is 12mm OD and passes through the 12mm support bearing of the offset cam ring, and both transmits rotational torque and supports impact loads from the drum.

There is no “bearing” inside the stem gear in the conventional sense – there is only reamed steel on polished hardened steel with some oil in between.  Hey, if there’s one thing I learned from begrudgingly rebuilding an engine, it’s that steel on steel with a bit of oil in between is how every car works. What could go wrong!?

I knew going in I was betting a lot on this… technically a fluid bearing, but whatever…. working out. The friction would be higher than a ball bearing by far, but I was going to bank on the length of engagement making up for it with a light pressure resulting from the contact area.

Anyways, the gear end of the stem gear interfaces with the existing split-planetary gearbox and makes the thing go up and down.

One of the biggest challenges of Roll Cake has always been where to put the battery. When you scale robots down, you inevitably hit a “component Planck Length” of sorts – essentially, at some scale of robotting, the parts stop getting usably smaller. For me, the prismatic battery has always been troublesome for packaging inside a wedge-shaped robot. I played around with several methods, such as this one placing the battery forward and vertical…

…and including the unpalatable approach of splitting the battery up into two smaller ones. I really didn’t want to deal with the extra wiring and now squeezing on space for other components.

But one night I had a moment of come-to-Plastic-Jesus clarity – perhaps it is a reasonable compromise (it is – there ain’t no Perhaps, I’m just stubborn) to ditch the notion that the flipper has to span the whole width of the bot. At this point in the bot’s evolution, I should be thinking in terms of what makes the design work and what it actually needs, versus still trying to stick to my vision of “robot go flap-flap”.

In mulling over the compromise for the arm design, I also included a mockup of the new wheels, which will have a spur gear included on them to mate with a pinion on the motor.  I ended up just rolling with the C2028 motor and ordered a few from Hobbyking. Optimal? Maybe not. Fits back there and in stock? Hell yeah!

I decided to keep the battery arrangement shown – where the battery is placed widthwise in the bot, leaving the left half or so open to be used for the flipper linkage. This suddenly freed up a WHOLE LOT of volume inside the bot, and it was honestly a relief.

Before I went further with that design, I actually backed up and basically started over on another thought in my head about the design. There’s technically nothing stating Roll Cake had to be round. In fact, V1 was not round. Having the corners back could result in the difference between fitting in the battery vertically versus not, so I tried generating a square (chamfered octagon, I suppose) version of the frame to see if that was profitable.

Admittedly I did get pretty far along here – I found a vertical cavity for the battery and even was able to make space for mounting the drum motor. There wasn’t really anything preventing me from going with this design.

What swung me back the other direction was actually the sheer amount of usable space opened by repositioning the battery in the round design. I did want a Roll Cake in which trying to injection-mold ESCs and hyraulic press wires inside wasn’t even going to be an issue. From there, with an ideally working bot, I would make space optimizations as needed.

Well that does it for me. I returned to the round design and began cutting out cavities for everything. There’s gratuitous volume now to put things, and almost makes me wonder if Roll Cake could be a little smaller. However, for now, the final diameter was driven by giving the most space to the drive wheels and batteries while retaining an acceptable arm width that didn’t reduce it to just a stick.

Adding internal boss features to support the drum hub and drive motors now. I also made a crossing retainer for the battery – it sits in a neat little cavity and is prevented from bouncing around by the low wall and the eventual top plate. The geometry for the trigger pin is also taking shape.

Inside the left half of the bot, I made more space-filling features to mount the trigger servo. The dimensions did require cutting a hole of sorts in the underside to clear the servo cable. I moved the servo up as far as I thought was reasonable while still keeping the trigger pin on a radial path into the clutch ring gear.

Smaller but important features are now rolled up including the integrated wheel pegs and the arm pivot. The wheel pegs were going to be a machined piece, but gradually became so short there was no point in machining a part and using a mechanical attachment method. Instead, just printing the peg would do!

Notice how the bottom of the peg has a flat on it – to counteract the messy nature of homogenous-material support lattices in 3D printing which never really prints bottom-sides cleanly, I just made the peg a D-flat to give a single flat surface for the support to finish and the part to build. The eccentricity potential of the wheel from the bearing being on an incomplete circle is going to be negligible; worst case I’ll stuff a shim into the gap.

I put the arm pivot at the very front tip of the bot to make the arm as long as possible in order to get free height at the flipping end. This constraint would drive the arm shape and the placement of the linkages.

I made a first approximation of the arm after that. It had to start out higher than the bot’s upper slope surface in order to clear the cam and ring gears, which is why there’s a mild kink in it. You can see the cam ring passing through the arm here – I used this as a guide to make a cut that was just barely enough to clear it.

From there, it was relatively easy to make the linkage by fixing the cam linkage centered in the bot and fixing the arm in the lowered position. The lower anchor is a simple pin joint I modeled on the backside of the center crossing span of the bot, so all I really needed to do is adjust lengths and the position of the pin joint on the arm itself.

I tuned the linkage lengths to give me in the end around 4″ of rise. The end driving constraint was not hitting the crossing span in the middle when extended, but also when folded, not closing more than about 60 included degrees (or 30 per side measured from the centered cam link as a baseline).

At that point, which is my mental cutoff for “sensible linkage”, the orthogonal loading force from pulling the linkage open is twice the actual opening force, and just gets worse as you collapse the linkage more.

(This, kids, is why your elaborate scissor lifts never work in 2.007…. wait until you take 2.12 and understand the Jacobian matrix)


Here is that “JUST BARELY” cut I talked about – when the cam’s coming up, there’s only a few thousands of an inch of clearance as the arm goes up.

In real life, as I found out, the slop in the system actually made it such that the cam lifting shoved the arm upwards, helping the linkage get started out of the folded position. Sci………ence?

As a matter of habit when designing the smaller bots, I began adding hardware to make things more realistic for weight. On a bot that’s tight in space selectively like Roll Cake, I also wanted a sense of where fastener heads were going to go. So it turns out McMaster actually has intricately-cut models of their shitty sheet metal screws for download. I didn’t even know shitty sheet metal screws were 3D modeled, really. Either way, it was handy to see how much fastener head you actually need to clear.

The arm and linkages also get their dose of “Real-ification” by the addition of shoulder screws and properly sized counterbores, thru-holes, and tapped holes.

The linkage length allowed me to finally add one feature that Roll Cakes Past have never ever had: a rear structural link. There was enough leftover space to put a crossing span in the back with a bolt to tie it together! This might be the most structurally sound Roll Cake yet.

Space was tight enough that I needed to put the bolt model in and make sure I could still tighten a nut. The length of the righthand cavity was adjusted a little bit to be just barely longer than the bolt, so I can, you know, actually install it.

The three holes in a row above the rear crossing span? It’s a removable piece, serviced from the rear of the bot, so I can install and uninstall the arm linkage.

It’s a little hard to see what’s going on here. This is a counterbored, hidden cross screw which holds the front half of the bot together. It’s installable from the outside by squishing it past the O-rings in the wheels. You’d otherwise barely know it’s there!

This might be a better view of where it goes. It is sunk about an inch into the right hand (here, left side) half of the bot before the thread diameter begins, in order to put that much plastic in compression first.

I moved onto making some kibbles and bits for the bot – here are two little feeder fangs to try and get under someone and make sure the drum gets first punch. They’ll be waterjet-cut from some kind of leftover steel.

We’re getting awfully close with the CAD now. I took care of some more last details, such as the tiny half-round ears for if the bot gets flipped over to prevent the drum from hitting the ground. While Roll Cake can obviously drive upside down, the double-sided flipper was deprecated post v1, so it still has an “up” side. Maybe one day I will try bringing the double-sided flipper back.

I then made wire passthroughs and filleted corners and broke edges. This is the now-complete “unibody” frame.

I took snapshots of the side cavities and traced them in order to generate conforming top plates. The hole locations were patterned where I could and kind of freelanced where I couldn’t, at a fixed distance from the nearest profile curve.

To actually make the bot, the monolithic model had to split into three pieces – the two halves, plus a drum axle retainer for the non-motor side. I generated cutting surfaces for this operation. The split is not linear, but has a jog in the middle to accommodate convenient locations to begin and end the frame profile.

The cover plates are modeled from the sketch drawings individually. I suppressed the monolithic body and  imported all of the cut pieces and properly constrained them in order to yield the multi-piece modeled frame.

So that does it for Roll Cake 3’s design. In the next episode, I have to actually build the damn thing!